Friday, March 31, 2023

Water like honey or silk

You might remember I'd tried some film long exposure photos a couple weeks ago, here. One of the common long exposure photo effects is to turn running water into milk. That's mostly not something I'm interested in. My tastes run more toward a fog flowing over rocks effect, or getting interesting reflections or textures in the water. 

That's the result here. I was actually doing two experiments at once. One was simply the long exposure film experiment of water flowing over rocks in Fish Creek. The other was trying a phone app called Viewfinder. It turns your phone camera into a combination view finder and light meter, but it's better than that. It also calculates the exposure times for whatever ND filter you put on your camera, up to 10 stops, and lets you take notes, and keeps the meta data! It was only 4 or 5 dollars, and I figured it would be worth a try.

I'm quite pleased with the app. It took a bit of back and forth to set it up for my GW690 and figure out some of the subtleties of the light meter. I'm still not convinced I've got it totally nailed down, but it mostly agreed with the light meter I've been using, and the resulting calculations required. I only had to make the slightest exposure corrections in NegativeLapPro and Lightroom, which could be called personal taste rather than getting a perfect exposure, so it's close enough. I'll have to get out and do more long exposure photography, of course!

Part of the trick of capturing water flowing over rocks at this time of year is finding liquid water. A couple spots I had in mind were still frozen over, so I'll have to remember to visit them later in the year.

Here's the the photos that worked best from this roll.

1. I was a bit worried when metering that the tops of the rocks would be over exposed, and the water would be solid black. All these exposures were about 2 minutes.


2. The best of the bunch from a composition, and flowing effect, I think. I had to use a gradient filter to bring down the brightness on the right side a bit, and sure enough, some of the detail came back.


3. This one was fun. I've got two slightly different versions, trying to balance the light on the snow, and the dark water. The flowing water effect doesn't show up as well as I had hoped, but the reflections are nice.


4. I'm showing off a bit here. This had no real need to be a long exposure photo. The water is fairly calm in that pool, but what this does is clarify the reflections a bit. They came out better than I had hoped. This was a tricky scene to meter with all that bright snow on the left, and shadows on the right.


5. One photo left on the roll, and not wanting to walk too far. I saw the little log in the middle of the scene and as I was thinking about the water ripples, that little cross-wise stick arrived. I watched it balance, slowly moving back and forth. Quickly set up and click, wondering how the slow motion would be captured and if any of the foamy bubbles floating downstream would be captured as streaks. No and no. But the water texture here! Love it! Now if only I could figure out what was causing that highlight pentagram in the top centre. I've seen it before in some photos, and it might simply be a function of that lens pointed into the sun or bright light. 


Wednesday, March 15, 2023

Learnings, B&W film, long exposure

 I'd done some long exposure photography on digital recently, here and here, and had lots of fun doing it. The intent had always been to try it on film, and I'm finally getting around to it. 

Even doing this digitally has its challenges. In most digital cameras the light meter looks through the lens, and if you've screwed on an ND filter, what it's seeing is pretty dark. Running the shutter speed down to the 30 second maximum might not show you anything on the back of the camera. It might be impossible for the camera to achieve focus, meaning either focus manually, or set the focus before screwing on the ND filter and hope nothing moves. The usual route is to guess at the camera settings and try it. Look at the results, tweak as necessary to achieve your artistic vision for the scene. This might take a while but it's good practice. Just make sure you know which way the tide is going.

Film is more difficult because the try till you get it right approach isn't going to work. One solution is to figure it out with a digital camera first, then translate the results to the film camera. Except, just because you're using ISO 100 film, for example, doesn't mean setting your digital camera to ISO 100 gets the same sensitivity result. An f stop setting on the digital camera might not mean the same thing as the f stop on a different lens on a film camera, and almost certainly won't if it's a medium format film camera.

Except I found a formula. Shutter speed times 2 to the ND filter number power. There. All clear? Good to go? Maybe not.

So, assuming I'm using my GW690, which has no light meter. I use my trusty phone app to discover that for a scene, the settings are 1/125 second at f16, which is not a surprising setting for a normal exposure of a subject on a sunny day. To do a long exposure of that scene I screw on an ND1000 filter, which is a 10 stop filter. Don't ask me why it's called 1000.  A whole lot less light gets through the filter to the film, unless I leave the shutter open longer. How much longer? 1/125 times 2 to the 10th, which is 8.2 seconds. The point 2 doesn't matter. I'd probably do 9 seconds, maybe 10, because film tends to deal with over exposure better than under exposure.

Now let's pretend that after experimenting with the digital camera, you know you aren't getting the effect you want, and you need 16 to 20 seconds of exposure. That's fine. Change to f22 to halve the amount of light coming into the lens, and leave the shutter open twice as long, 16 seconds in this case.

Except, in another film complication, there's a thing called reciprocity failure. For most normal exposure settings on a camera, the shutter speed and aperture f stop are related, in terms of how much light goes through the lens. A small opening for a longer time, can be the same as a bigger opening for a shorter time. (Yes, for the pedants out there I'm ignoring depth of field issues.) Double one, half the other, and it's the same amount of light, for most practical purposes. Except for film, when the light starts getting dim. 

Film needs a certain amount of light for the chemical reaction in the film to work. This varies with different film stocks, but after a second or so of exposure, (which would typically mean a night time exposure, or an ND filter exposure, or some funky intentional camera movement photo) this needs to be taken into account. Going from a 2 second to a 4 second exposure might not be twice the amount of light, you might need 6 seconds to give the film enough light to react.

In case you missed it, long exposure photography works best if there's something that moves, typically water or clouds, and something that's fixed, like a pier or a building. I wanted to get out and try it, and had a spot in mind. The only hitch in the plans was that it was clear blue sky. I got involved in something else for a while, and headed out when it started to cloud over. I was thinking some cloud motion with a blue sky background would be good. 

Except I left it too long. By the time I got there, got set up, tested the exposure and composition with the digital camera, it had pretty well clouded over and was getting windy and cold. I was glad I wore the parka. At this point I didn't know the formula, and used the digital settings plus a bit of by guess and by golly, knowing I could do some compensation during the digitization process. The film is Acros II ISO 100, which doesn't especially have a reciprocity failure issue, which does simplify things.

As a minor technical note, there's two ways of the shutter staying open. One is Bulb mode, where it stays open as long as you hold the button down, which had better mean you're using a cable release or else you're moving the camera and destroying your image. The other is T mode, meaning push the button and it stays open till you change the shutter speed. Which is what my GW690 has. The trick is to cover the lens with a hat, then reach under it to change the shutter. AND THEN DON'T FORGET TO CHANGE IT BACK FOR THE NEXT EXPOSURE. Learned that one the hard way.

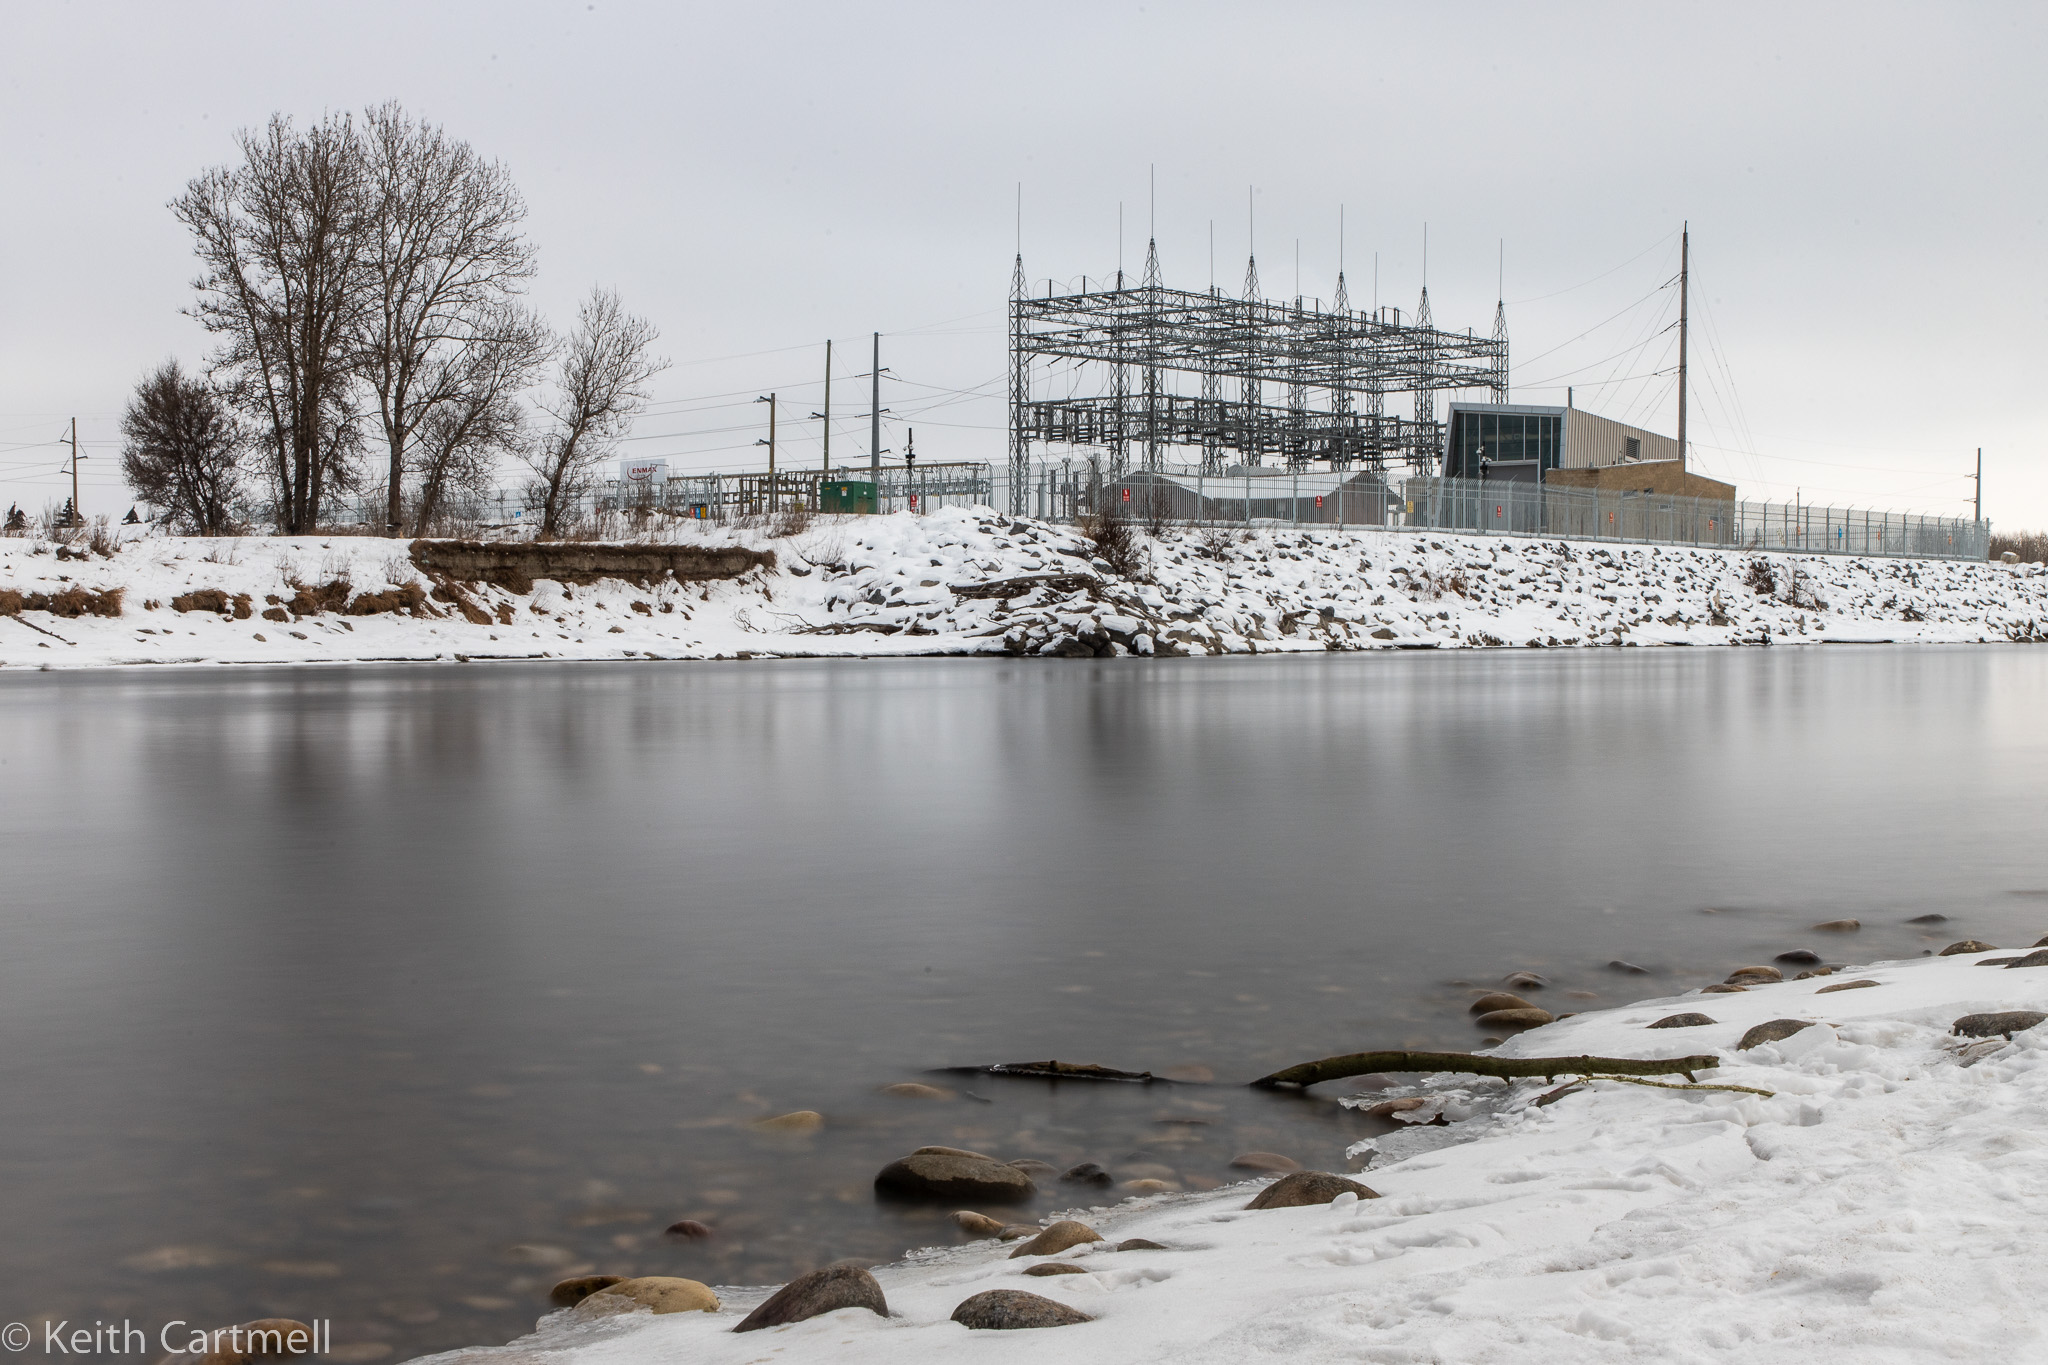
1. Here's what the scene looks like with a normal exposure. This is the Bow River near the Ivor Strong bridge. Not going to win any awards with this, but that's not the point.


2. This is actually a minute long exposure at f22. I wanted to smooth the water out as much as possible. See how much better the reflections show up in the water? It would be a much more interesting photo if the clouds had cooperated.


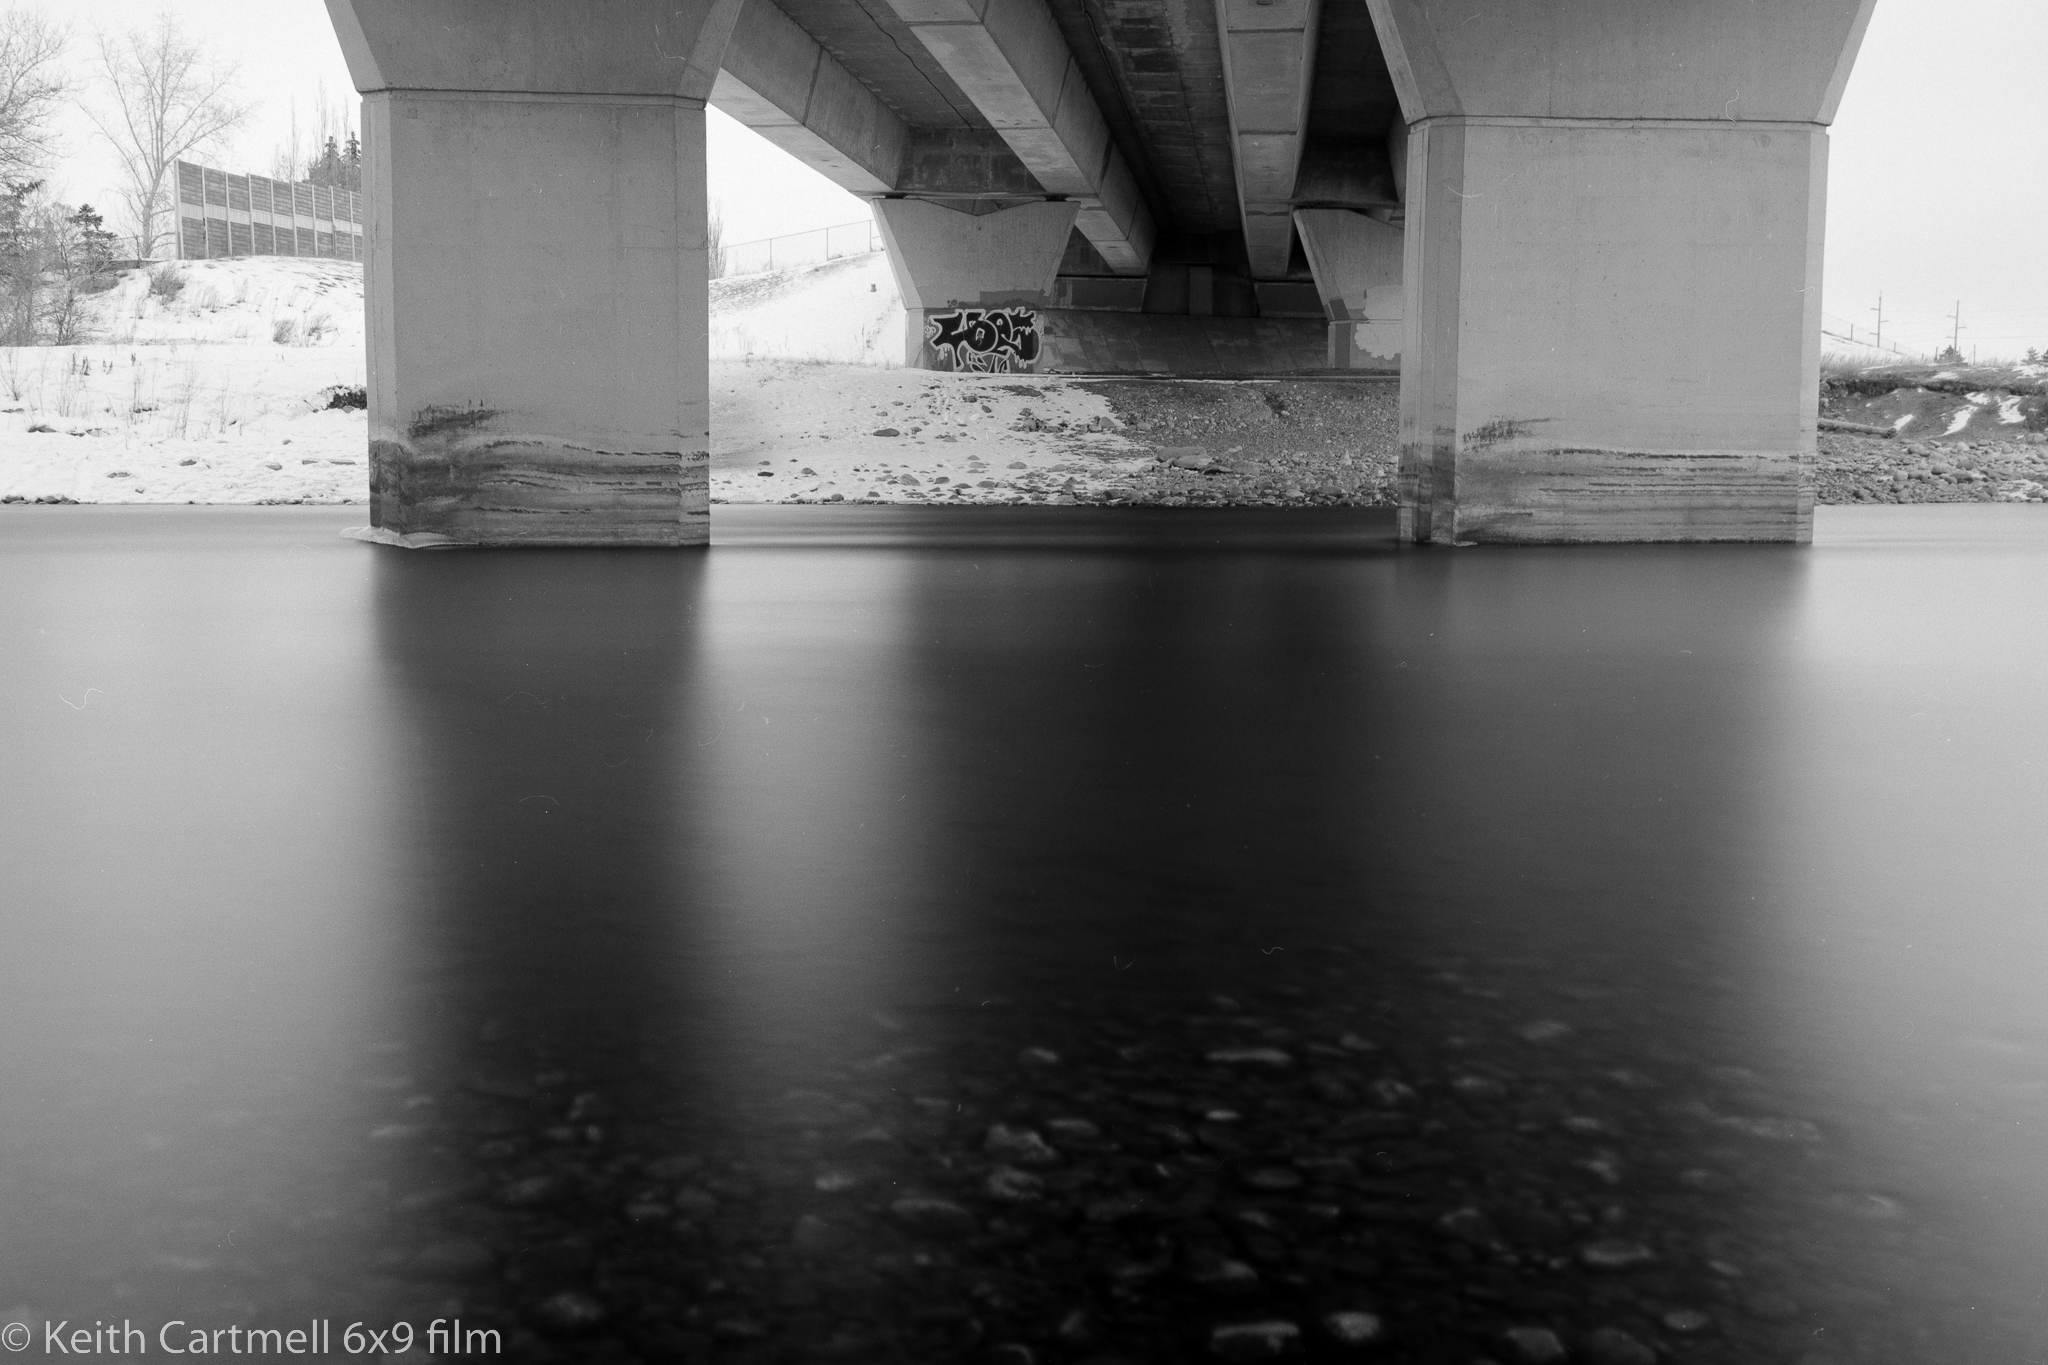
3. Under the bridge was much darker, and with some math in my head figured I needed 4 times as much light, so went for a 4 minute exposure. Neither of these images needed exposure tweaking in NLP or Lightroom so I guessed about right.


4. Then over to Mallard Point to finish the roll. By now it was getting colder and darker, so I hand held the digital for 30 seconds just to see what the light would be like, and figured the film would need 90 seconds. This looks a bit dark, and yet there's no detail in the snow. Maybe if I wanted to be really fancy I could mask it in Lightroom and play with it a bit, but the odds of anything good coming of it are small. Notice you can't see the birds that flew through the scene.


5. Just to amuse you, here's the digital colour version, 30 seconds at ISO 200.


I'm thinking about other places to try long exposures on film. 

Sunday, February 26, 2023

V Island beaches on Gold 200

We wanted to go somewhere warmer than Calgary and get away from winter for a bit. Much as we love New Zealand and want to go back, there was still enough uncertainty about travel that we didn't want to ante up that much money. Having a thousand dollars held by West Jet because a flight was cancelled isn't so bad. We know we can use that. Having something on the order of $10K to $15K held by an airline that might not be flying to Canada again is a different proposition entirely.

Vancouver Island is about the warmest winter place in Canada. We hadn't been to Sooke, and decided to stay in an Airbnb to explore the coast up to Port Renfrew. The house was huge and perfect for us. The flight experience was about as good as it gets, and no problem with the camera film. The car rental company upgraded us. We managed to sneak in a lunch with one of Linda's buddies she'd worked with for a long time. 

Most of you probably know it's kind of rainy in BC year round. We were prepared for that, with temperatures typically in the 'wear a sweater under the rain jacket' range. Seeing lots of liquid water is a treat, even if it complicates carrying a film camera.

I took the digital with 3 of my most used lenses, plus the GW690 with a bunch of Kodak Gold 200 and a couple rolls of Acros II 100. I took along a laptop, but hadn't intended to edit photos during the trip. It makes for a heavy carry on. The problem with my film cameras is that they are not water resistant. There's no battery or electronics to short out, but there's lots of delicate mechanical mechanisms that probably wouldn't like salty water at all. 

So the film camera lived in the bag most of the time. As did the other two lenses, and some other stuff. It slows down the beach walking even more than the coarse pebble beaches. Some of the places for the best digital photos (the long exposure, the Potholes, the water fall, the beach rocks) I either didn't think of the film camera, or didn't want to risk it getting wet. Plus there's the whole having to put the bag down somewhere mostly dry, open it up, dig out the other camera, put the digital somewhere, get the photo(s) and then put it all back again. For the long exposure, it was me and the camera bag on a big rock, surrounded by water. To say I was careful about putting on the ND filter and all the other changes is an understatement, and even with the care I still got my feet wet. I would have liked to try the long exposure on film after doing digital to get the settings, but the tide was coming in fast. Typically it was too damp to be carrying the film camera on a strap. I even put the digital in a plastic bag for part of one walk.

There are, of course, some photos that are almost duplicates between film and digital. I'm not deliberately creating images for the purposes of comparing film to digital. That ship has sailed, as one of my managers liked to say. It might happen because I've used the digital as a sophisticated light meter, or I get the digital, and decide I want a film version as well. The portrait photo below is one of those. The photographer in the photo was amused that anyone was still doing film. 

If you've been following along, you know I took that camera and that film to Yukon last September. I nearly swooned when I saw the photos. That film was PERFECT for Yukon colours. Not so much for BC beach driftwood. I think many of them came out a bit more orange than I liked, and playing with the settings didn't seem to do much good. Even though I typically expose for the shadows, and let the highlights take care of themselves, I'm thinking I underexposed several of these, leading them to be a bit more orangey red than real life.


1. Like this one. Playing with the settings in Negative Lab Pro got weird very quickly.


2.

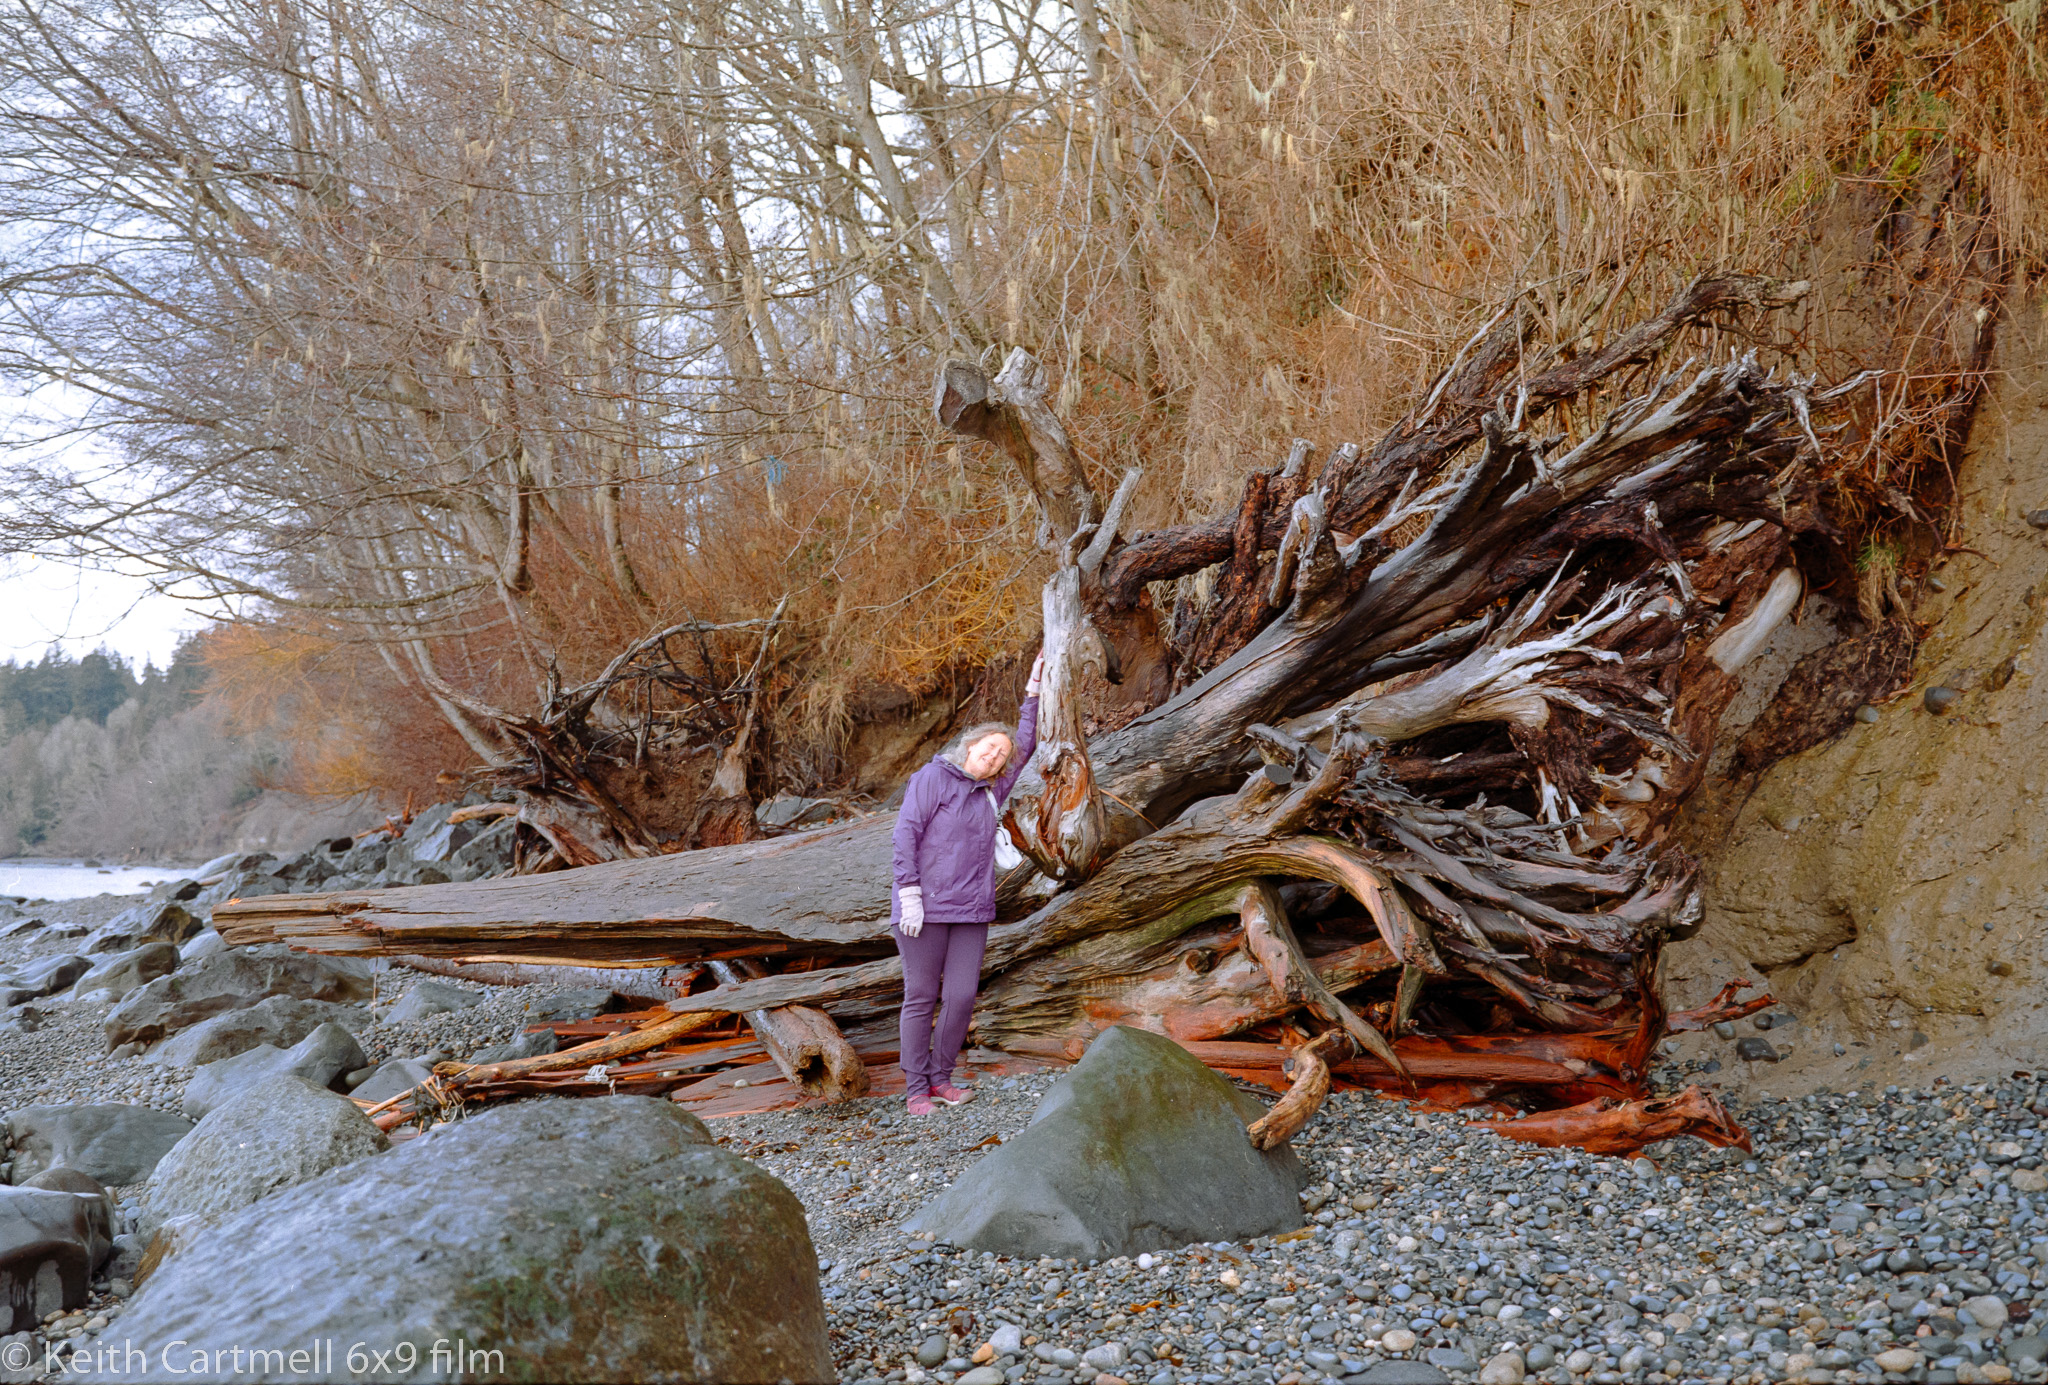
3. The colour here is mostly good, but Linda's purple outfit is considerably more vibrant. I was trying to expose for her face, but I don't think the light meter is that precise.


4.

5.

6.

7. I was fascinated by how the wind has shaped that tree.


8.

9. The promised portrait. I asked these nice people if I could capture them, and did film and digital. This image is cropped in a bit, and I should have got a bit closer. There are subtle differences between the digital and film versions.  I should have moved the square of whatever it is out of the left side of the image. Live and learn.

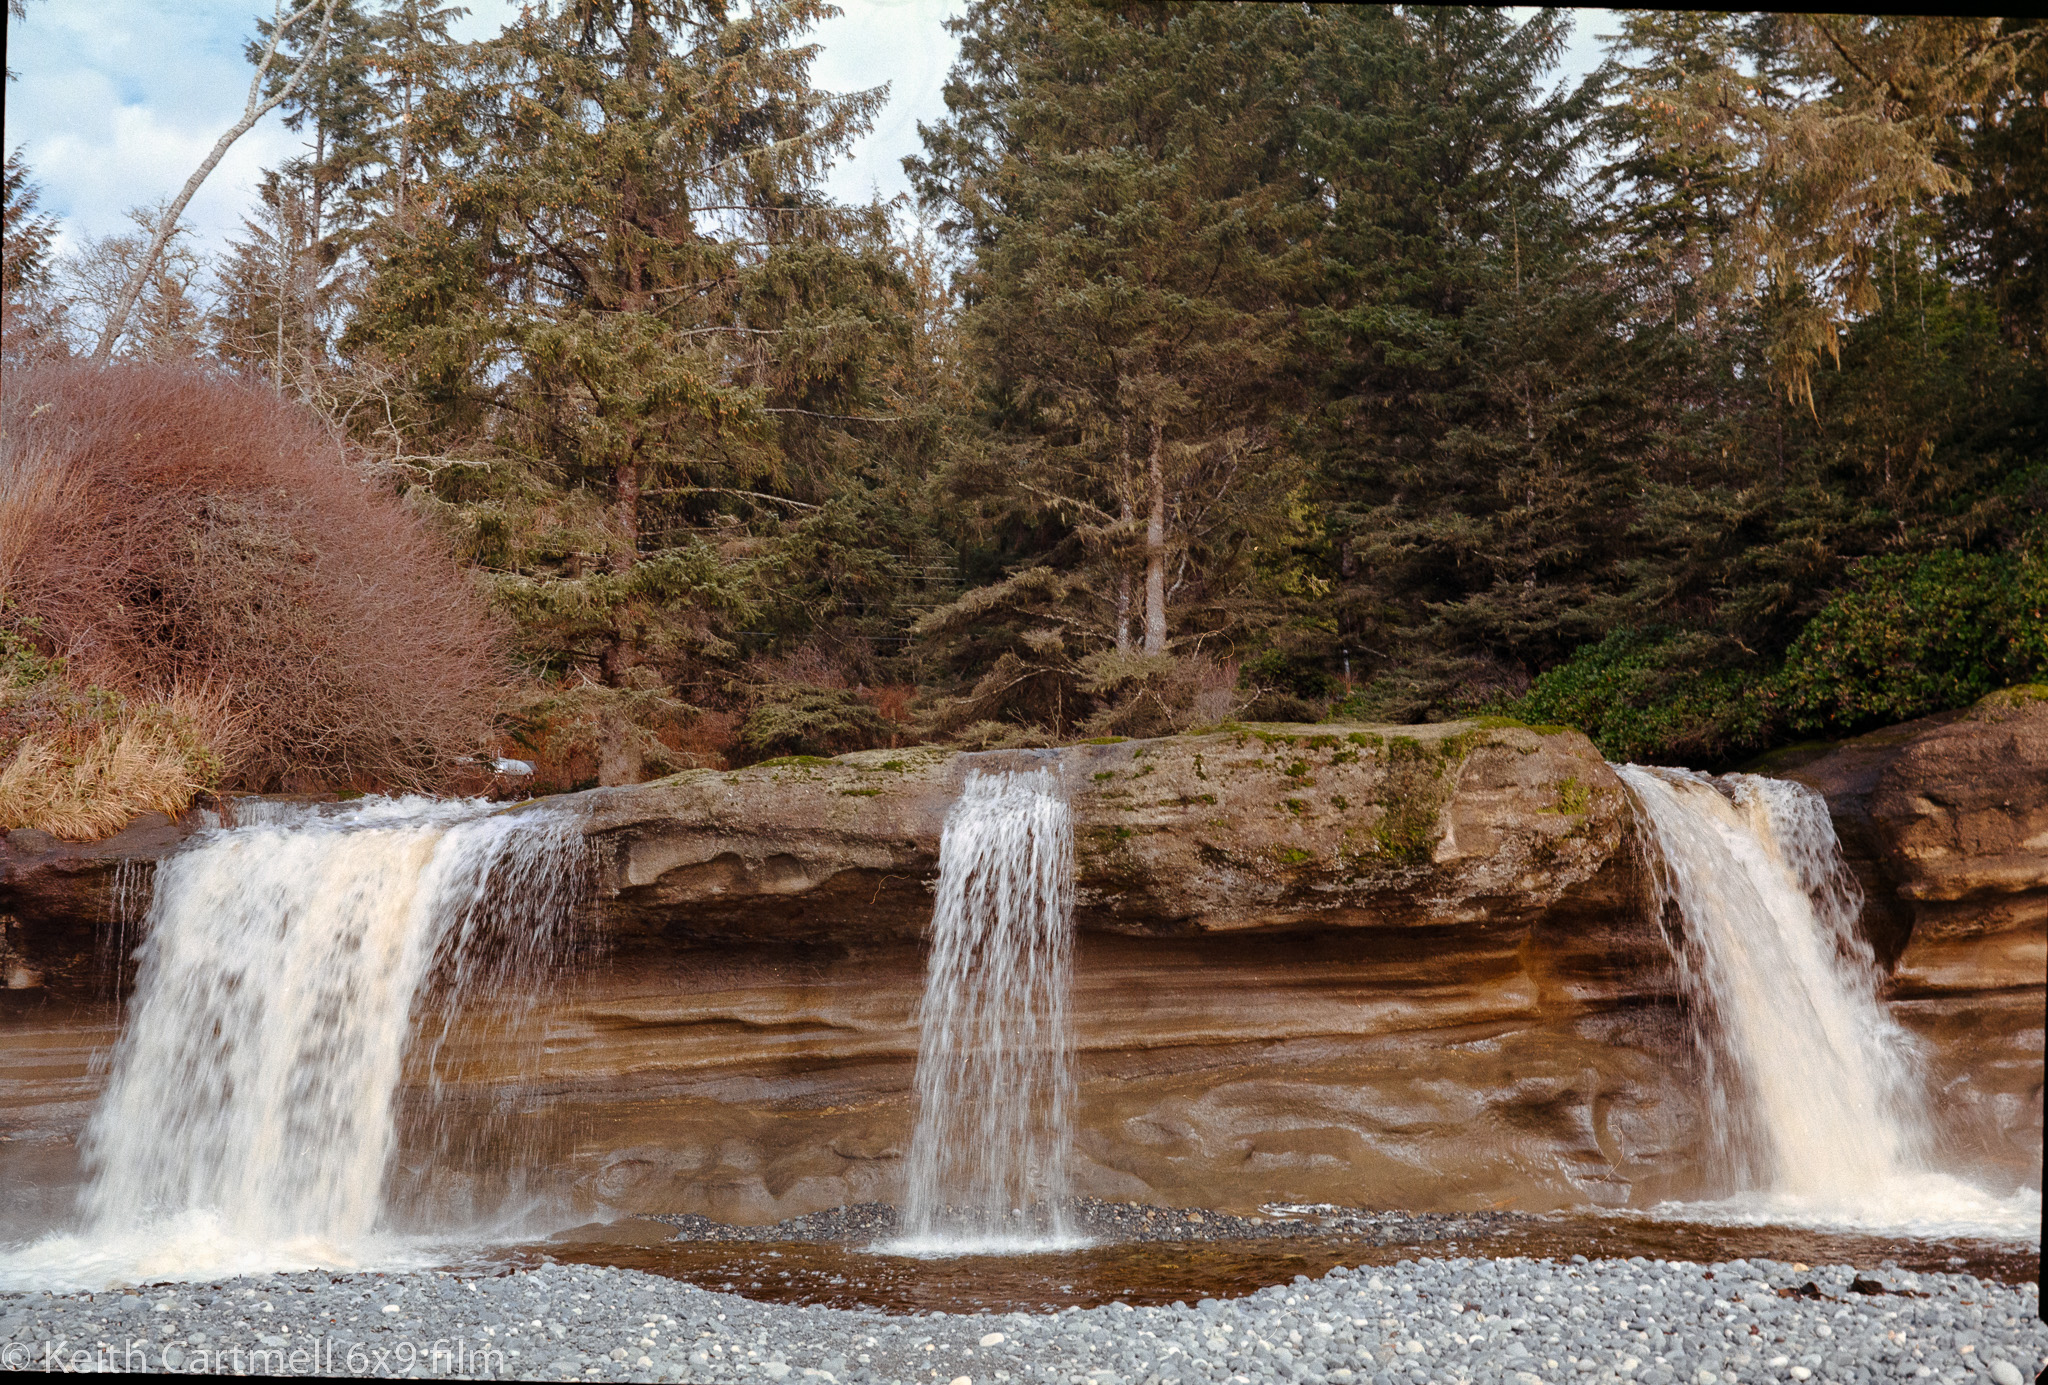
10. The GW690 has a fixed 90mm lens, about the same as a 40mm on a 35mm camera. The zooming happens with your feet. The ocean is right behind me, and I do mean right behind me. A big wave came in and I had wet feet again. Good thing the Airbnb had a hair dryer. I was chatting with another photographer and showed him the digital versions. He's been back several times to get that photo because often there isn't a place to stand at all, with the waterfall going straight into the ocean for most of the tidal cycle.


11. Part of the Sooke Potholes gorge, giving just a hint of the fabulous light I had. This is cropped in quite a bit to get rid of some lens flare and a stupid branch in the upper left of the image.


12.

13.

14. This is part of the Galloping Goose trail built on an old railway line. This is distinctly more orangey red than in real life.


15. What you can see of the bridge deck is considerably closer to the real colour. 

16

Overall I'm glad I took the camera. I quite like some of the images, even if they don't quite overwhelm me like the Yukon ones did. I'm wishing I'd taken it out for some of the forest photos to see how it dealt with dim light and all the deep rich fabulous greens and browns. But then, those digital photos were at ISO 1600, f2.8 and 1/100 of a second, and were still a bit dim. If I've done the math right I'd be down about 1/8 or 1/4 second and I wasn't carrying a tripod.

I'm coming to realize that I need to decide if a photo ramble is to expose film, or digital. It's hard for me to do both. If I was going to be doing those beach rambles with just a film camera, I might still be there.

You may have got here following a link from Facebook. I'm mostly taking a break from Facebook for a while. If you don't want to miss any posts you can leave a comment asking to be added to my blog notification email list. Or send the request to keith at nucleus dot com.

Saturday, January 28, 2023

A photographic discovery

Readers who have been following along between this blog, and my personal one, know I've been sorting through the packets of old photo prints and negatives we had in a box in the basement. You have such a box as well, don't lie to me!

In looking for something else I came across the box and was diverted for a while looking through the prints. But there were negatives as well, and since I've been capturing current negatives, I wondered what the old ones would be like, and how they would turn out.

So in light of what I discovered, I need to clarify old. I knew we had a wedding album from Linda's parents, and various photos of me that older relatives had sent. But I was thinking the oldest negatives would be mine from the late-80s till whenever we got the first digital camera. Which to some of you young whipersnappers, that seems really old. Humph. There's days my brain still thinks it's mid-80's and wonders what's happened.

But then I came across some negatives that were an odd size, and I could see a really old truck in one of them. After digitizing, and I'm glad I got the glass plates because they wouldn't have fit in the carriers, we were amazed to see photos from the very late 1940's or early 1950's through to the early 60's. We think. We're checking with some of Linda's aunts to see if they can shed any light on who some of these people are.

One set of negatives is 127 film, and the other is 120 Kodak Safety film, in two different sizes, 2.25 inch square, and 2.25" x 3 3/8 (8.5 x 5.5 cm) which is essentially a modern 3:2 ratio. I'm guessing that 3 different cameras were used, but no idea what they might be.  

We have no idea how the negatives came to be in our box of photos. Neither of us have any memory of them being given to us, and we've never seen prints of them. We're guessing it happened maybe mid to late 90's. I've put the photos in an online folder and sent a link to Linda's relatives, and the feedback so far is they love them! Which makes it worthwhile.

As a technical note for photographers, I didn't do anything special to these negatives. Fortunately they were stored flat in the box. They were all photographed in a batch and had essentially no processing in Negative Lab Pro. I'm a bit surprised they look as good as they do.

This is Linda's parents, but we aren't sure if the baby is Linda or her older brother. The negatives are in no order, so we can't rely on context. If her brother, this is from late 1953 if it's a christening photo. There are several others in this sequence, including Linda's grandparents. Most of the photos are essentially family snapshots, with a few posed portraits.


We believe this is Linda as a little girl, early 60's. In one of the sequence she is posing with a stuffed toy that she has no memory of, so it's possible it could be someone else. Again, nothing special was done to clean up the file. At this point I was more interested in seeing what we had, than in spending a ton of time cleaning up dust spots and negative flaws. If some of our family ask for a version they can print, or a really clean digital version then I'll take another image with a better camera, and clean that up. 


The truck I first noticed. If this were one of my photos I was editing, I'd probably crop out the bottom third of it, the rocks and brighter grass not adding much. But I'm thinking of this more as historical photo journalism.  I've no idea what year or model the truck is.


By today's standards, none of these photos are particularly sharp, but that's to be expected. That they exist at all is kind of amazing. I'd like to post more of them, but want to give family the time to look them over and identify who's who. We're pretty sure some of the people are still alive, and I don't want to go publishing an old photo of them without permission. One of the photos has Linda's dad posing near a fire truck with some of what we believe are his colleagues. I've reached out to a person running a memorial page for that fire department to see if they are interested in the photos. I'd be astonished if not. The descendants of those people might be interested in seeing the photo.

I've written a bit about photographs, and what happens to them when the photographer passes away, and the differences in that process for printed and digital photos. The digital version of photos are ephemeral. They can disappear in the blink of a hard drive crash, a forgotten password, or a software update. Prints (in a book or framed) will last for generations with a bit of care, and can be looked at by anyone with functional eyeballs. Negatives can exist for the same amount of time, but generally can't be looked at by an ordinary person and be 'seen'. They need to be converted to a positive, whether through a traditional darkroom process, a scanner, or a digital camera. Assuming I live another 30 years, and that box stays in a cool dry environment, and somehow gets passed to another photographer, they could pull out the negatives and get essentially the same photos, since my digital versions will probably have vanished. Then they start the whole "who are these people" process over again. Maybe I should put a note with the negatives...

These negatives are mostly on the order of 70 years old. An eyeblink in terms of other historical documents, middle aged for analog photographs, but are before the beginning of digital time. The first digital photo is from 1957 and was scanned from an analog photo. The first digital camera was in 1975. The iPhone 3 in 2008 really kicked off digital photography. (Thank about that a moment, the smart phone is only 14 years old, or so, and has completely revolutionized our society, to the point of replacing those reels of tickets so people could take a number for faster service.) At that point no serious photographer would be using a digital camera because even 35mm film was light years better.

There are a few images from back then available now, having been migrated from computer to computer, probably mainly for historical interest rather than artistic merit. We have no way of knowing for sure, but I would not be surprised to find there are more 'lost' images, than what exist now. Just think of how computers have evolved in a few decades, and it's inevitable that photos and documents will be left behind, essentially inaccessible. 

I'm delighted to have a peek back in time, seeing what people looked like when young, seeing what else is in the photo that wouldn't be noticed at the time, such as vehicles, decorations, homes (I can only imagine how hideous that wallpaper was in real life), and general background. In several of the photos one of the people is holding a cigarette, you'd never see that now. 

Friday, January 20, 2023

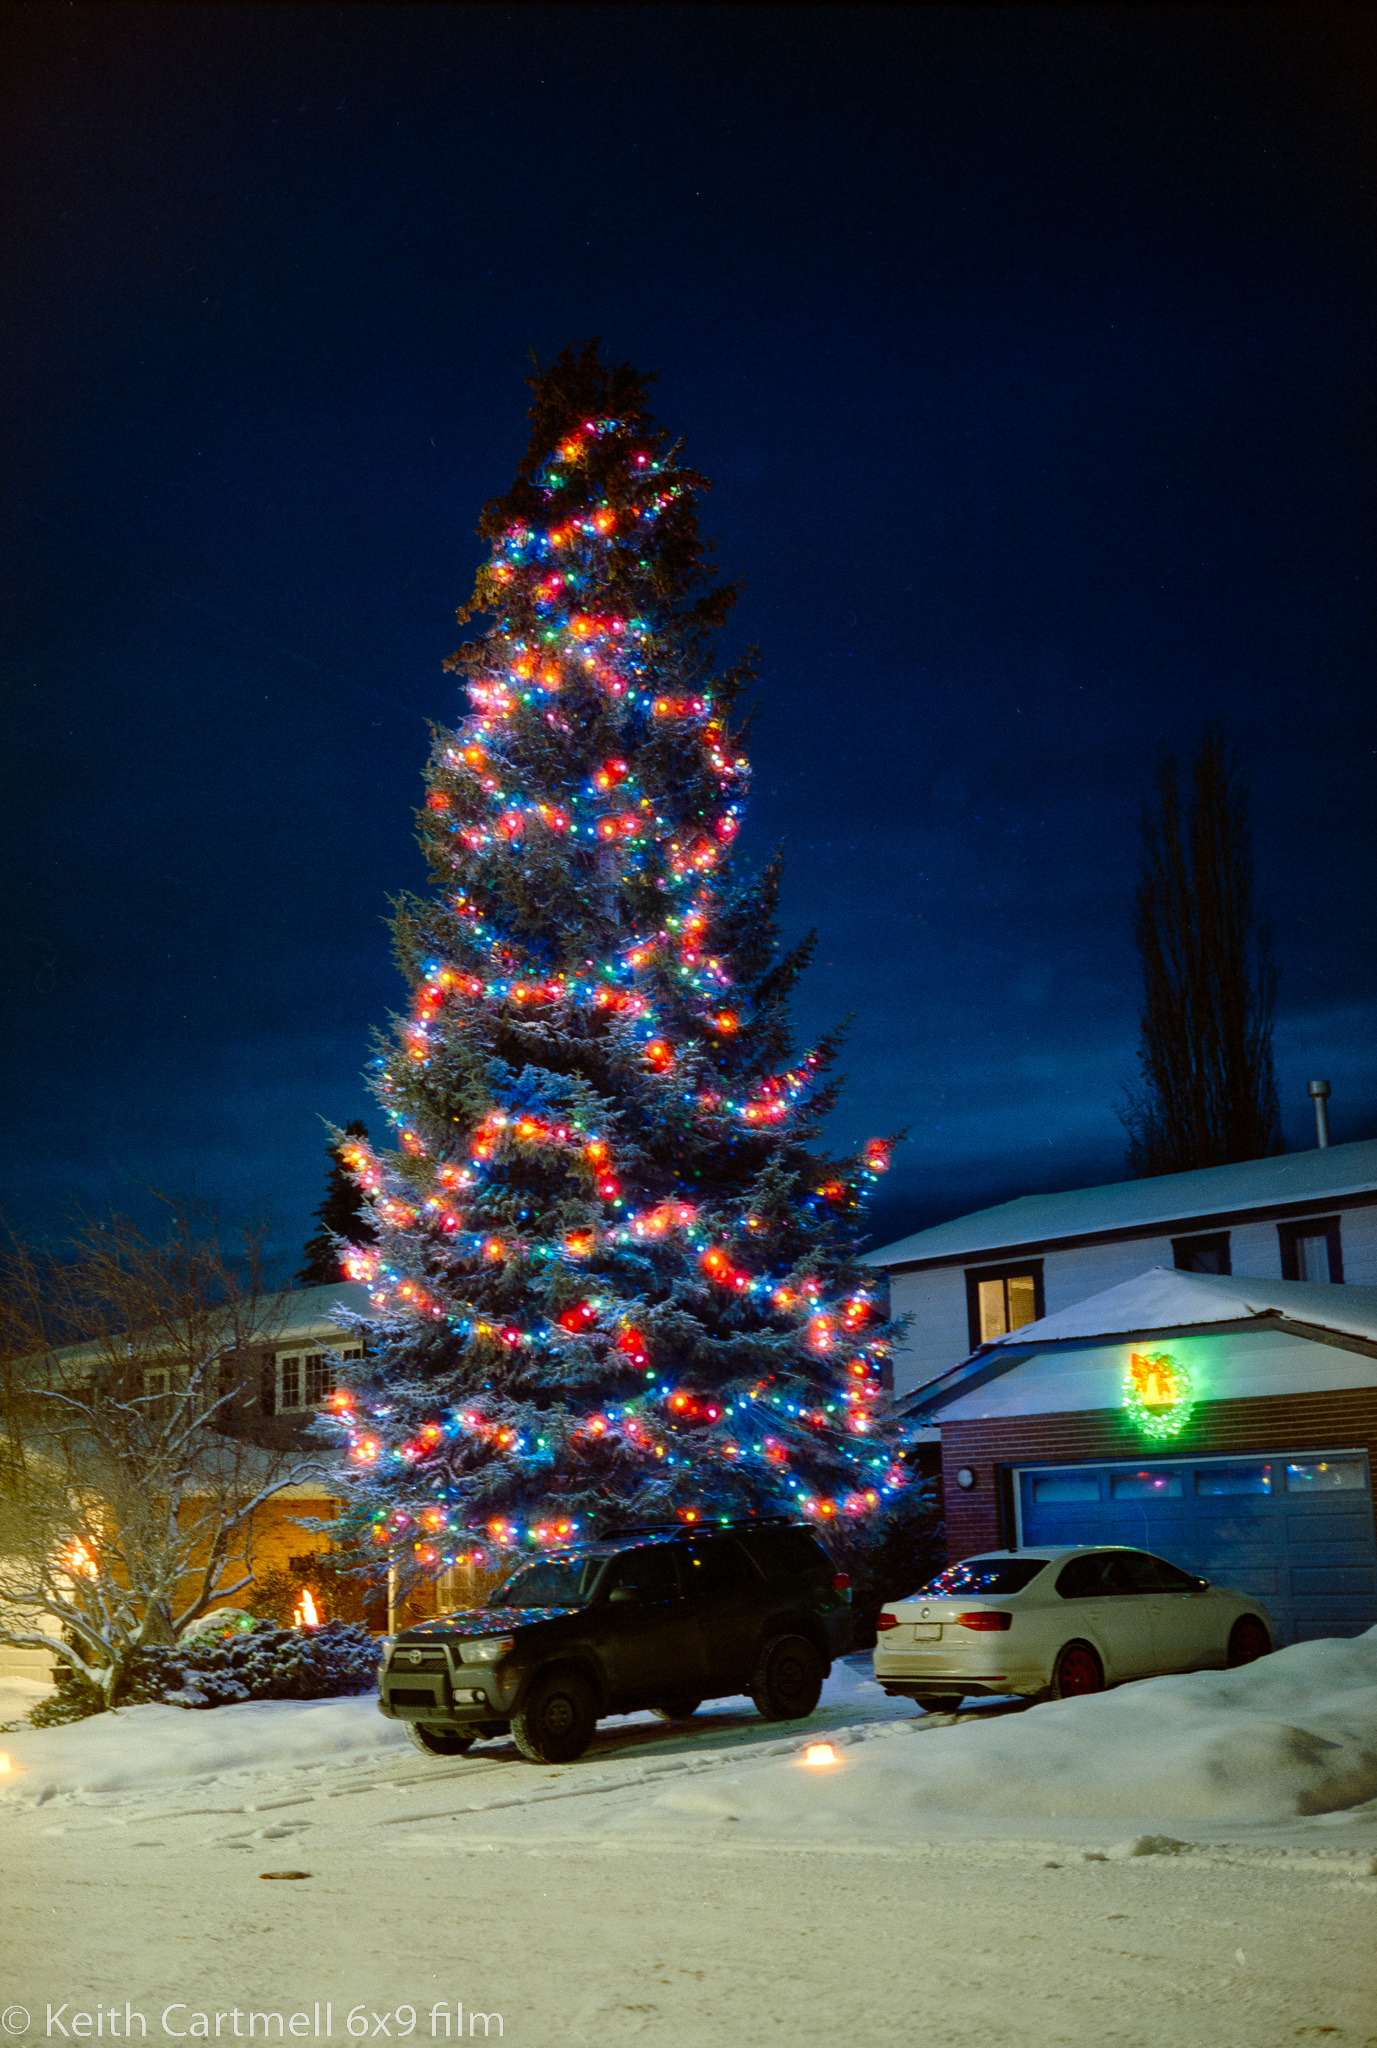
Xmas lights on 120 Cinestill 800T

Twas the season. Once upon a time I picked up some 120 Cinestill 800T thinking I'd do some city night photography with it. Then I forgot about it, though it was in the fridge right beside the cheese compartment that I look at nearly every day. Then I got another roll because, well, like I said.

If you're curious about film, keep reading. If you don't care about film technicalities, scroll down to the photos.

We had a long really cold spell here, and I wasn't thrilled about taking the film cameras out in it. They're metal, and would get cold quickly. The film would get cold shortly after that, and I started thinking about what temperature film gets brittle. I didn't find any definite answers, but the suggestions lined up pretty close to how cold it was outside, which was well into minus WTF territory. Being honest, when it's that cold it's easy to stay home and read or watch a movie.

The first evening it warmed up to something mostly civilized, like maybe -10C or something, I had the film loaded and away I went. Linda came along to spot as I drove around our neighbourhood. There were not as many light displays as I had hoped. Halloween seemed much better.

Eight photos goes quick, and then we got to the Griswold's near Michelle's place. I thought I had one more on the roll. I sighed big time when I put the exposed roll in the fridge, and saw the second roll. Had I realized... At that point I didn't want to go out again, and did want to see what the exposed film looked like before I went and exposed more. If I'd made a terrible mistake I wanted to know. This is expensive film, about $22 a roll to buy, and another $11 to develop. 

Anyway. The fun, or the downside of Cinestill 800T is that it's had the remjet layer removed, which means that some light can go through the film, exposing it like usual, and then bounce off the back of the camera and expose the film some more. This leads to a halo effect around lights, particularly neon lights, and particularly red lights. If you like it, you're in. If you don't like it, you'll use something else.

Exposure at night on film using a camera that doesn't have an exposure meter is something to be careful about. Normally I use an iPhone light meter, but occasionally bring the digital camera along to be a sophisticated light meter. I'm pretty sure I did that this time.

These were taken with the GW690, and the exposures were 1 second. Exposures longer than that, but shorter than about 5 seconds are a pain on this camera because it has a T mode, but not a B mode. But one second was easy, so it worked out really well. Normally I expose for the shadows and let the highlights take care of themselves, but for this I exposed for the brightest part of the lighting. I didn't mind if the sky and shadows were dark if the lights were right, and figured if it was too bit dark I could fix it in Lightroom.

There were only slight tweaks in Negative Lab Pro, typically Cinematic mode, and WB to Cinestill, with maybe a bit of tweaking to exposure and brightness. All I did in Lightroom was to rotate a few of the images slightly, and remove some dust spots.

1.

2.

3.

4.

5.

6.

7.

8.


I like how the colours came out, and the halation effect is interesting. I'll have to get up a night expedition with buddies and find a place to expose the other roll. Downtown, perhaps, or skyline, or maybe the Ogden industrial park. Maybe if I'm really organized I'll expose a roll of Gold 200 at the same time to see what I think. 

I've been using the Lomograph film carriers to hold the film as I take the photo of it. This has been a bit of a pain, especially if the film curls. I was absolutely convinced that one brand of film was slightly narrower than standard, making it almost impossible to hold them. Maybe I'll revisit those with the glass. Sometimes the film being curved can affect how the digitizing photo is taken. 

One way of keeping the photo absolutely flat is to sandwich it between two sheets of glass. Except if you use ordinary window glass you'll get ugly rings showing up because of how light diffracts through glass. But there's special glass that doesn't do this, and when I say special I mean expensive. I found a place that had some off cuts so got a couple pieces cheap. 

The process goes like this. Wash your hands with soap, really thoroughly. Wipe the glass, both sides, each piece, with a microfibre cloth. Use an eyeglass lens cleaning solution if there are smudges and make sure it's dry with no streaks. Take film out of the plastic sheath they came from the lab in, blow it off or dust with an anti-static brush. Lay as many pieces of film on the glass as will fit. Put the second piece of glass on top, being careful not to move the two pieces in relation to one another. The film strips don't have to be lined up in relation to one another. Place them on the light source. Tweak focus, take first photo. Now, move the entire light source, NOT THE PANES OF GLASS, so that the next photo is in the view finder, click, repeat. Putting film on the glass is much faster than loading in the carrier. 

In my digitization process I do not include the border, or the sprocket holes on 35mm film, but with the glass plate method I could if I wanted to. Doing this means being careful about your exposure because the camera could 'see' light directly from the light source. Sometimes white balance can be tricky in Negative Lab Pro if the border is included in the image.

I first experimented with some black and white film to see how it worked out, and to try to stitch multiple frames together to create a larger image. The process worked really well, though I didn't line up the edges quite perfectly, so instead of a print 4x3 feet, it would be about 4 x 2.5 feet. Not that that particular photo is worth it, but others might be, and I'm thinking some of the Tombstone photos. However, I hadn't taken any particular care to clean the film, so the dust spots were were insane! Note to self and all. If I had to print that one, I'd clean the film and redo the whole process.

Will I buy more Cinestill? I'm not sure. If I had a photo project where I wanted that halo effect, then of course I would. I'm looking forward to exposing the other roll and comparing to Gold 200. 

Will I continue on using glass rather than the carriers for digitizing film? Yes! It's way faster than fussing with the carriers, especially for curly film. It just occurred to me that I could put other materials between the glass with the film, like coloured gels, or two pieces of film.


Introduction to this blog

Welcome!

Hello and thank you for visiting my photo galleries. You can use the tabs above or the links below as you choose. The galleries will be upda...