Saturday, October 21, 2023

Medium format Ilford FP4+ in Jasper

 I have exposed several rolls of Acros II in my GW690 and quite liked it, but when the time came to buy more, there wasn't any. Such are just one of the trials of a film photographer. I picked out some Ilford FP4+ to try.

The first chance came in Jasper during a mid October trip with Neil Zeller. This was during the Dark Sky festival, but must admit the skies were not as dark as I had hoped. There's a story there, but that's for another time.

One of the nights we went out to a road that's closed for the season. We walked around the gate to the nearby bridge, and set up there. I had a number of digital photos that turned out well, but this is about film. Since it's difficult to aim and focus a rangefinder at the dark sky, I set the focus to infinity on the dial, which I know from experience is quite close. Composition? Given where the clouds were, I set up and aimed the camera straight up. 

One difference between digital and film is the exposure time to produce star trails like this. With digital the photographer figures out the settings to take a photo of the night sky. For me on a dark night, using a f1.8 lens, an exposure of about 15 seconds at ISO 1600 is a good starting place. From there I might tweak the settings depending on how the images look.

Once dialed in, the photographer will set the camera to take photo after photo with no time between them. That's about 4 photos a minute for about 20 to 30 minutes depending on how long you want the star trails to be. Then drop the photos into one of several software programs to stitch the photos together. It can look pretty amazing. Or stitch the images together in a time lapse movie. That's fun too.

With film, one sets up the camera, opens the shutter, and leaves it alone. Oh, and start a stop watch so you know how long it's been open. How long to leave it open is a bit of a question. It depends on the camera lens and the individual film characteristics, and they're all a bit different. My light meter isn't particularly accurate in the dark, and I'm not keen on spending lots of money for an accurate one. Reciprocity failure becomes a relevant word, which is why I liked Acros II for this. 

Which is better? I decline to answer that. They're just different. One difference is that if someone shines a light on the digital camera, that one image is probably ruined. You could drop that one out, and probably nobody would notice. Do that to the film camera, and it might ruin the whole exposure. I'd told people that I was running a film camera down at the end of the bridge and don't walk into it. They didn't. But gradually people migrated down there, and they brought their lights with them. Red lights, but still. I'm a little surprise that third one isn't brighter.

The negatives look a bit odd, in that they are almost entirely white. Once digitized, they are surprisingly easy to tweak to look nice. 


1. 15 minutes exposure.

2. 25 minutes exposure. No change to camera position. I advanced the film and clicked the shutter again. I could probably have gone 30 to 45 minutes.
 

3. About 20 minutes. At some point during this exposure the dew settled so the white in the middle of the photo is probably condensation. I'd been hoping to let it run for 30 minutes, but people were tired and wanted to pack up.


4. The rest of the photos are around town one morning, wanting to see what street scenes looked like under overcast skies. This is Jasper the bear.


5. Look carefully and you can see the tramway terminus at the top of the mountain.


6.

7.

8.

Overall, I'm not sure what I think of the film. The light was flat and it was tough to figure out exposure with a fairly bright overcast sky, and mostly shadowed streets. I did a bit of extra processing to bring up the shadows and get some cloud definition. Next time I think I'll try in a daylight scene with lots of light and lots of detail. 

Friday, July 28, 2023

HP5+ in an EOS-3

 There's been some bumps on the film road. I'd taken the Canon 7 out on Canada Day for some street photography and ended up having some problems with it. Eventually it locked up entirely. I just got the film back, and let's just say the results were interesting. There's some good frames, and lots of overlapping overexposed frames. My next project is to scan those particular rolls.

Mid July I attended a B&W photography session through The Camera Store. They gave us each a roll of Illford HP5+ ISO 400 film. At this point I didn't have a functional 35mm camera so I took the big medium format camera. I haven't finished that roll yet.

Shortly after that I found out the Canon 7 needed major repair work. It needs a complete disassembly and cleaning, and who knows how many parts are worn and need to be replaced. (If you want to take on this project, comment below.) 

I was looking to see what another one would cost compared to the cost of repairs, and found an EOS-3 for sale. This is one of the last film cameras made before digital took over, and was aimed at the so-called 'pro-sumer' market. It was what I had first looked for in a film camera, but couldn't find any locally, and went with the Fujica GW690.

In many ways it's a digital camera that uses film rather than a sensor. I traded in the lens for the Canon 7 and the EOS-3 was mine. The partial roll I'd rescued from the Canon 7 lockup was the first roll in, just to run it through the camera and see how things worked. Just looking at the negatives things appear just fine.

Then the HP5+, wanting to capture a variety of scenes to see how the film responded, plus work with the camera a bit more. I'm still learning to expose B&W film because what works for colour doesn't always work for B&W and vice versa.

Conclusions first. The EOS-3 is a dream to use, and that's before trying the eye focus system. I'm told it's unreliable if the user is wearing glasses with an antireflective coating, which I do. The controls are intuitive if you've been using a Canon 5 or 6 series digital. It handles well, and takes EF lenses. I think all these were taken with my 24-105mm lens. I've since picked up a 50mm lens, and can't wait to try that out.

The viewfinder is bright and clear, but the exposure compensation is vertical on the right side and it seems to pick up reflections that make it hard to see. I solved this by wearing a hat, which I normally do during photo sessions anyway. It's a similar size and weight to my 6D, and the shutter click is quite loud, so this isn't a stealth street photography camera. I might write more about the camera after I use it more.

The presenter (I think it's Chris Donovan) noted this is a forgiving film with wide latitude for exposure and pushing or pulling. I exposed these at box speed, aiming for a normal exposure, but looking for scenes with both dark shadows and bright light. Negatives were developed by Paul Stack, but I don't know the specifics. The negatives were digitized by me using a camera and a good macro lens, then inverted in Negative Lab Pro. Except where noted below, there was very little editing in NLP, typically increasing contrast a bit, and making the darks a little darker. In Lightroom there was only a bit of cropping and dust spot removal.

Out of the 36 exposures, all were in focus and nicely exposed. There's only 25 below, with the others being poor photos or having enough dust spots on them that I want to redo the digitization process. 

1. Linda in afternoon sun. She might be slightly under exposed since there's a bit of grain showing.


2. Our library. As you'll see, I love reflection photos.


3. The library again. 


4. Some outdoor nature photos, looking for the reflection from the hill above Votier's Flats in Fish Creek.


5. Looking for the clouds in the sky, but without a filter.


6. Near bridge 2.

7. The famous bridge 2, the most scenic bridge in all of Fish Creek.


8. I wanted the blades of grass in focus to play with the depth of field button. More experimentation needed. 

9. Reflections.

10. More reflections.

11. There was a photo of the underside of the bridge, but with lots of dust spots, and a bright lens flare on the left side.

12. My favourite reflection this walk.


13. Scrambling up the hill east of bridge 2. The rest of the photos till you get to Michelle are late afternoon light, taken on the escarpment loop from bridge 2, scramble up the hill to the south side of the park, then down the hill through the forest to bridge 1, not taking the paved path. In places this is hang onto a tree steep.


14.

15.

16.

17.

18. This burl is a highly contrasted black and white. I worked with this a bit to bring up the contrast to more closely resemble what I had seen. In the real world the background was a bit darker, and the centre part of the burl was whiter. 


19.

20. A steep path down, with lovely light through the trees.


21. Another burl not far from bridge 1. Somehow, I've never really been happy with any of the photos I've taken of this.


22. A parking lot reflection.


23. My favourite model Michelle, willing to pose to finish off the roll. Every camera I have loves her, and this film loves her. There's one more photo from the very end of the roll that I need to scan again. There were some dust spots, and I think it's easier to re-scan than edit the spots. These are mid-morning, with fairly strong light.


24.

25.

I can add you to my blog notification list if you'd like to know when I publish a new blog, either this one or my personal blog. Just send an email to keith at nucleus dot com, or comment.

Thursday, June 22, 2023

The score, 21-13-5-5-4 to 48

You're probably wondering what sort of a game produced a score like that. The film photography game, that's what.

So firstly we're talking medium format, using the GW690 loaded with Ektar 100, or Kodak Gold 200. I'd taken some flower photos with the Gold 200, still working out how red appears on film. Then mid-June Sean (check out his many photos from a recent Europe trip!) and I headed out Sheep River. The winter gates had just been opened, so we went all the way to the end, and scoped out the state of the river. He is contemplating a hike where in the first 100 m you have to wade the river.

We drove back to the main target for the morning, Sheep Falls. I was pretty sure I'd been there, but I had no actual memory of it. Even the photos I have of it from a Zeller road trip didn't cue anything. However once I got there and wandered around a bit, it all came back to me. The main area these photos are taken from is a rock shelf that slopes into the river steeply enough that I was thinking very carefully about my footing, and it was dry. I don't think I'd walk out there if it was wet.

The point of the trip for me was film long exposures. I happily played with several compositions in tricky light, bracketing most of the photos. We had full morning sun, but with deep shadows on wet dark rock. From there we did the short drive downstream to Indian Oils. I remembered this well enough, but had forgotten just how badly the bridge messed up waterfall compositions. Darn those engineers for building a bridge in the cheapest and most convenient place! 

I was using a 10 stop ND filter, and most of the exposures ranged between 20 and 50 seconds depending on the film and the exact light levels. However, the concept of reciprocity failure did not enter my brain, and it should have for those films. All these could have used a bit more exposure time. Then again, trying to capture white water and dark rocks in a single exposure is tricky.

1. Three of Sheep Falls from slightly different places, slightly different exposure times. While many people like the falls themselves, I'm often more interested in the subtle textures and colours in the water just downstream of the falls.


2.

3.

4. OK, you got me, not a long exposure. 


5. Another not a long exposure. One of the thoughts I was thinking was to overlay a long exposure on top of a regular exposure and see what that does for the textures. The first attempt at doing that in Lightroom didn't work, so I'll have to buckle up and try Photoshop. If you hear distant swearing, that's probably why.


6. Two slightly different compositions for Indian Oils, trying to avoid the bridge. It's just behind my left shoulder as I'm working on these photos. You can just see the bridge and railing shadow lower left. 


7.

8. Indian Oils canyon downstream of the bridge, with the wreckage of the old bridge visible in the distance. This is a tough exposure with the bright sun and deep shadows. I metered for the distant rock wall just beyond and to the right of the bridge wreckage. The small version below has the shadows a bit dark, but the full size version shows some detail.


9. This is the dark shadowed wall, slightly over exposed and if you do a deep pixel dive in Lightroom you can see it is ever so slightly out of focus on the left side.


The score, you ask?
48 is 6 rolls of film, 8 photos per roll.
21 photos edited. Some here, and in a later blog I'll show the flowers, Takakkaw Falls, and Moraine Lake.
13 bracketing photos that were under exposed, I think because I didn't account for reciprocity failure. My bad. 
5 (covers face in embarrassment) rookie mistakes, in trying to take a normal exposure without taking the ND filter off. Sigh. There are days I think I should print up a little checklist and tape it to the back of the camera.
5 grossly underexposed, badly composed, and out of focus almost images, trying to capture a small segment of the falls in deep shadow while trying to not slide into the river. One leg of the tripod was actually in the river.
4 where I had similar photos and these were ok, but there was a better choice.

After finishing at Indian oils we headed downstream, and I bribed Sean with an offer of lunch in Longview. That let me drop in on the Film Experience camera store to buy more film. We were disappointed that the lunch place we had in mind has closed. Diamond Valley (used to be Black Diamond, now merged with Turner Valley) is a happening place these days, and we had a great lunch there. All in all, another great photo ramble.

I'm thinking I'd like to try going back to Sheep Falls to try some combinations of black and white film, earlier in the morning, gentler light, accounting for reciprocity failure, and some different vantage points. One of the limitations of film is that I need to think about images in sets of 8, to finish off a roll and then try something else. The digital shooters out there are going "See! Digital is better!". And in the sense of changing ISO from photo to photo, doing colour or black and white, or doing in camera HDR, yes, digital is more flexible. However, it's limitations that spark creativity. I'm coming to understand that I want to be the one that creates an image, and not merely be a mobile tripod for the camera.

If you know what reciprocity failure is, or you know that you don't want to know, stop here. If you don't want to miss the next in my irregular postings, sign up for my blog notification email list. To do that, leave a comment here, email me at keith@nucleus.com, or text me.

Big picture, reciprocity failure is film not responding to light in a linear way. For digital sensors if you double the exposure time, you get double the light through the lens, and (duh!) the image will be twice as bright. For film, it mostly works that way, until it gets dark. Film needs a certain amount of light for the chemical reactions to take place. 

So for example, if your light meter is telling you that you need a 5 second exposure, the film might not get enough light in that 5 seconds to trigger the reaction with the silver halide crystals to get an image. For Lomo 100 you'd need a 30 second exposure. With Aros II it would be 5 seconds, and with another film it might be 10 seconds. 

Each film has different reciprocity failure characteristics, which makes life complicated. Often you can estimate that meter exposure time to the power of 1.3 gets you in the ballpark, but it's probably something you want to look up for the exact film in your camera for that photo session. Which I didn't do.


Monday, May 22, 2023

A year with the Fujica GW690

A bit over a year actually, but time flies when you're having fun. Some of my best photographs of the past year were taken with this camera. This is the most recent, a long exposure from just upstream of Elbow Falls. Film is Kodak Gold 200.


A couple things have come together to produce this particular blog. It started as I was browsing through images looking for something suitable for VERO #momo or Monochrome Monday. I found a few places where I hadn't done my Lightroom key-wording right, and as I was fixing that I found some images I'd lost track of. It was nice going back over them. And yes, I did select an image and put it up on VERO. (Look at the top of the blog roll for a link to my VERO photos.) This one, if you were wondering. It's one of the first images with this camera, taken on a road trip right after picking up the camera. Film is Acros II.


I've put about 45 rolls through the camera since late March 2022 and have thoroughly enjoyed the whole process. Keep in mind that I'm not an old school film photographer that converted to digital and then went back to film as a nostalgia trip. My only film experience was a point and shoot using the cheapest film that Black's sold. More recently I'd read about film photography and wanted to at least try it. A friend generously lent me a couple 35 mm Nikons, but they never felt happy in my hands and I struggled with the split ring prism.

Then I picked up the Fujica GW690 in a film photography store in Longview, Alberta. (Yes, this tiny little town is a mecca for film photography.) It felt right at home in my hands, and I hadn't known I was a rangefinder guy till I tried to focus it. For all that it's a huge camera mostly made of metal, it does not feel heavy or clunky. It feels solid and comfortable. There's 3 versions of it but I have the original. It first came onto the market about the time I was graduating high school.

I had to essentially learn the differences between film and digital photography. The camera doesn't use batteries at all; thus no auto functions and no light meter. It does exactly what it's told to do. I use my phone and have got pretty good at estimating the settings for the light and the image I want. Most film can cope with being a stop or two wrong, especially if you tend to over expose. Digital photography changed the way I look at the world, and film photography has changed it again.

But, I hear some readers saying. But why film? But isn't it expensive? But isn't it a drag waiting to finish the roll and then wait to get it developed? But don't you have to convert to digital anyway, so why bother with film?

Digital is all about the end product right now. Why not take the photo of some random scene? Take another, just in case. Goofed on the settings? Chimp your brains out. Keep taking more images till you get what you want. Edit and filter it to your heart's content. Let an AI product have a go at it to make it into the photo an algorithm decides to create. Drop it on Instagram and wallow in the likes. 

To some extent, comparing digital to film photography is comparing apples and oranges. Yes, they're both fruit, but there's a lot of differences. Lots of people have done image comparisons, but I don't have the technical expertise to do that in a meaningful way.

Film is more deliberate, especially with an older camera. I put more thought into the images, or potential images. I tend to edit them very lightly in Negative Lap Pro mainly because I'm not trying to make them look perfect or like digital. About the only thing I do in Lightroom is spot removal. 

I enjoy the process of manual film photography. Deciding which camera to take (I have 2 film cameras, and one digital that I could take for a walk.) Deciding which film, if there isn't film in the camera already. Thinking about where to go and what I might find there. Then looking at the various scenes and thinking if they would make a good film image, or how to work the composition to get a good image. Adjust the settings and focus, 2x everything, relax, and click. Or rather, ping! The GW690 makes a mechanical ping sound, which is not the leaf shutter. I'm told it's the mechanism on the bottom of the camera  that counts the number of rolls, but I'm not sure why or how accurate it is. 

Then I drop the film at the lab, and typically a couple days later I can pick up the big beautiful negatives. If I've done everything right the images amaze me. I've goofed a few times on various aspects, which is to be expected and it's a learning experience. When I say big negatives, I'm not kidding. They are 6 cm high x 9 cm wide. This is about 5 times the area of a 35mm negative, and commensurately more detail. How much detail, you ask?

Look at these two images. My favourite model Michelle and her husband, as I was showing off the new to me camera. The film is Acros II on an overcast day. This digital image was captured from the negative using a Canon EF 100 mm f2.8 L macro lens, and lightly edited in Negative Lab Pro.


This is not a digital zoom of the above image, it's photographed again using a Canon MP-E 65mm macro at about 1:1. This image is about 15 or 16 mm wide out of the original negative, and was edited slightly differently.
 

That tells me if I do everything right, and have a subject worth it, I could print an image about 10 feet across, detailed enough to count individual hairs. I'm not likely to need any more resolution than that.

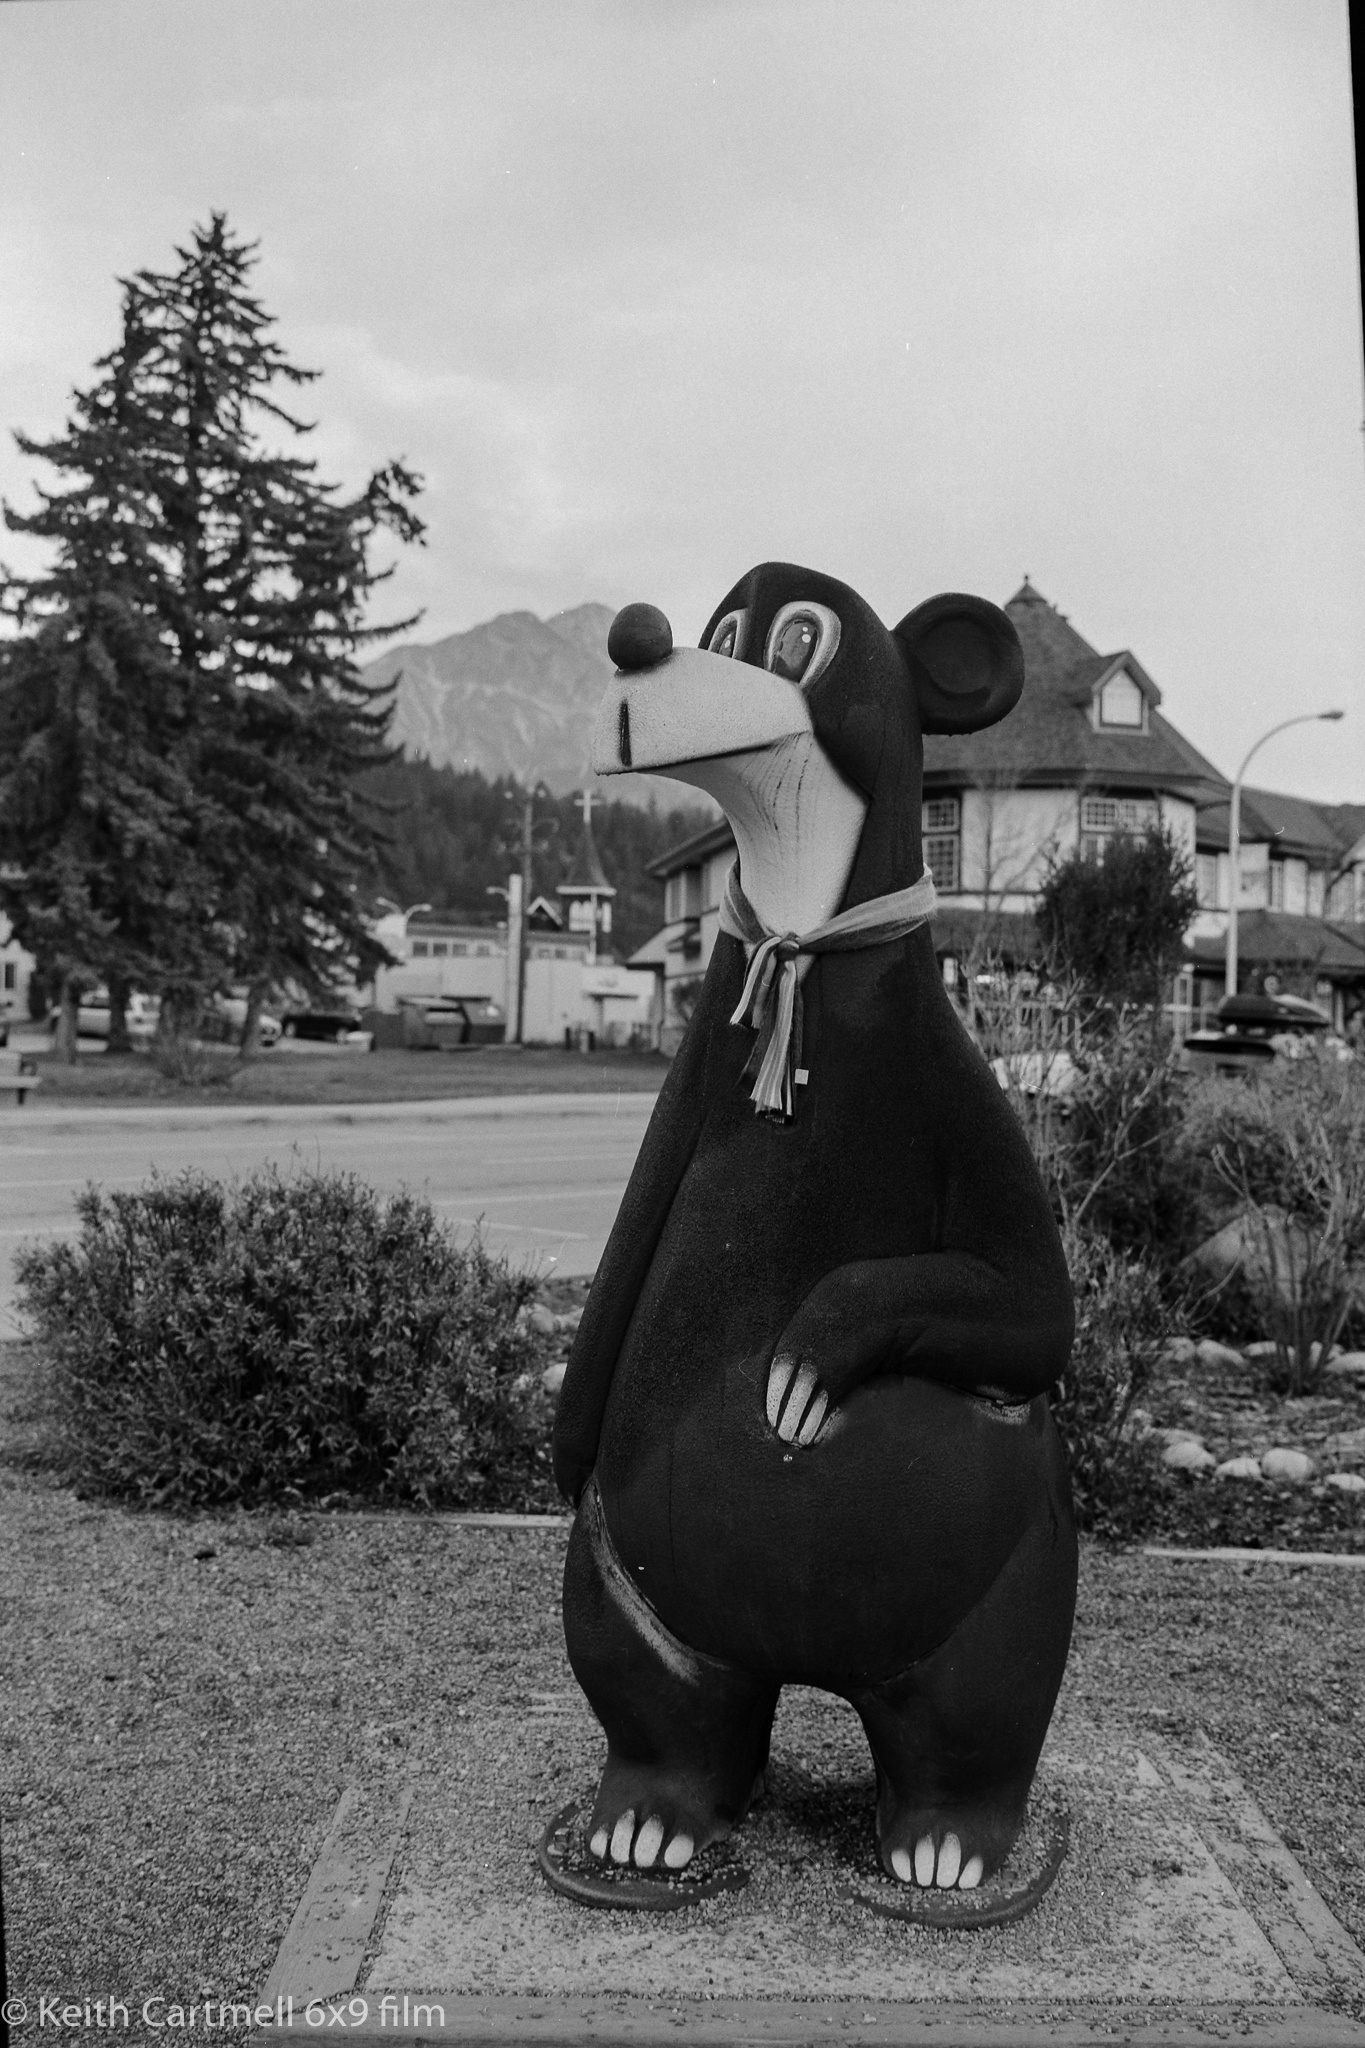
Part of the process is conversation. The only people that talk to me when I'm using a digital camera are the people at the event that know me, and it's seldom about the camera. When I'm around other people with the big film camera, lots of people ask, and a surprising number are familiar with it, or know of it. I've had some lovely conversations with other photographers that started with the camera. Like this one. The guy on the left used to shoot film, and was thinking about it again. I never would have asked to take their photo if I hadn't been carrying the film camera. We had a nice chat as we strolled the beach. Film is Kodak Gold 200.


One of my best photos from last year with this camera was during a Yukon trip in September. I took along Kodak Gold 200, and was stunned at the colour. This photo is handheld. You can see other photos from the Yukon trip here, including this one.


As for the expense, the camera itself is much, MUCH cheaper than a digital camera and lens system. I can't find the paperwork, but I think I paid $650, and a version 3 of it is available for $1100. After buying it, my only expense is buying film and paying to have it developed. Most 120 film is about $10 to $15 a roll, some a little bit cheaper, some lots more expensive. Developing costs just over $10 a roll, so I tell people my cost is about $25 per roll, for 8 photos per roll. Eek! Some say $3 a photo, when digital is free? Are you out of your mind? 

Keep in mind that digital isn't free. You had to buy the camera, the lens(es), SD cards, a computer and probably an external hard drive, and a program like Lightroom or Photoshop. Without even trying that could be a $5K up front cost, and could easily be $10K. 

I can expose a lot of film for that much money. But really, lets say I expose a roll a week, that comes to $1300. No hobby is free. There are people that drop that much at Starbucks every year. Plus when I see a sale on film I can stock up. 

Is this the perfect camera? Of course not. It's not even the perfect film camera. It can't focus closer than about a meter so macro photos are right out. Most of them have the T shutter speed, rather than a B, so there's a trick to long exposures, and exposure times between 1 second and 5 seconds or so are kind of tough. The lens is a fixed 90mm. To say it's not unobtrusive is a huge understatement, so it's not the camera for stealthy street photography. The ping, or rather PING sound of taking a photo is off putting for some people. Some people are not fans of range finder cameras. Some want (need!) a light meter.  Whatever.

But it's become my favourite camera. I don't take as many photos with it but it's fun carrying it around as I look for, or create photos. I think about projects I can use it for. Here are some photos of it with my DSLR for a size comparison. Looking forward to making lots more photos with it!

Saturday, May 6, 2023

So that didn't work 2x, and a Lomo 100 review

Part of the fun of film is not knowing what you'll actually get once it's developed. You can plan, do exposure calculations, double check focus and lens cap removal, and still be surprised. This image, for example.


I was out for a walk with some buddies in the Forest Lawn neighbourhood, informally known in Calgary as The Hood. With that clue, some of my readers know exactly where I was for that photo. Then again, if you squint you can probably read the street sign.

Those of you that have followed along know I've been doing some long exposure work on film, mostly with running water so far. I'd been thinking about traffic, wondering how that would turn out. Yes, light trails at night are fun, but I was thinking of daytime.

The Co-op store and gas station was an ok background, but what I was really after was the blurs from passing traffic. So two points. I'd carefully double-checked the exposure with a 10 stop ND filter and with Kokak Gold 200 loaded (It was what was in the camera for a previous session that didn't happen.) I came up with a 13 second exposure. That much worked out just fine. 

Here's where the guesswork came in. I had no idea if the vehicles would be in the frame long enough to captured or not. Pretty much not. The one above is the best of the bunch, and you'd have to be pretty keen-eyed to find the transit bus in there. Look for the faint horizontal white streaks across the middle of the frame. It was just sitting there, off to the left of the frame for several seconds after I opened the shutter. I had hoped to see that as a faint but recognizable image, then the ghost trail heading right and fading out as the bus accelerated.

Here's where I goofed. I took all 8 images at the same exposure time, plus or minus a second or so, varying the traffic conditions. What I should have done is open the shutter a stop for each new exposure and shortened the exposure time accordingly. I started at f32 and 13 seconds, should then have done f22 and 7, f16 and 4, f11 and 2, then f8 and 1 second or so. With the GW690 those last two would start getting tricky as the camera has a T mode, not a B mode for long exposures.

At some point, I think I'd get the results I'm looking for. Of course, as the shutter time gets short, it also becomes more tricky to time the traffic. Once I know which exposures work, then it's time to find the right composition, where the background is actually interesting.

In one of the eight exposures a man is walking through the intersection while the shutter is open. He'd held back a bit to stay out of my photo, but I told him to do his thing, that I was hoping to see him as a faint blur. Can't see him at all.

That was the first thing that didn't work. I found out the other thing that didn't work shortly after the long exposures. I'd also taken the Canon 7 along, loaded with Flic Film Elektra 100. I was happily finding window reflection photos, knowing I was near the end of the roll. Then I looked at the camera, thinking I had to be at the end of the roll. It said 39. I know sometimes you can get 37 and maybe 38 out of a roll of 36, but 39 was a surprise. I figured maybe because it was an off brand it had been cut a few inches longer.

I did 40 and was sure there was a problem. Most likely I hadn't loaded it correctly and I hadn't made any exposures at all. Or that the film wasn't anchored properly in the canister as a manufacturing defect, and it had come out to be spooled onto the take up side. 

I started to rewind, and within a couple turns I got that subtle click that told me the film had been rewound into the canister. Oops. I ended up going to London Drugs and asked nice if the tech could pull it back out for me. There is a special tool for this. It only took him seconds. In the mean time I've got some Acros II loaded, so when it's done I'll reload the Elektra and try again. 

The Lomography 100 you ask? This is a cheaper film brand that I associate with variable colour chemistry, and with cheap plastic cameras. Still, I picked up a 3 pack of 120 for a good price and figured I'd try it. 

There is an alley near the above Co-op that has been painted as part of a beautification process. I'm dumbfounded there is no graffiti. We strolled and I thought I'd see how the paint turned out in the bright sunlight. I'd forgot that the GW690 gives me a pentagram flare when aiming into the sun, and that spoiled a couple of photos. Here's the best of the rest.

I didn't have to tweak the exposure in Negative Lab Pro or Lightroom. There were minor adjustments, and some dust removal. I'm pleased at how the colours are rendered. This film seems to do really well in bright sunlight. I have a few exposures taken in Fish Creek to see how some natural colours show up. There's 3 left on the roll as I write this. Maybe I'll have another go at some long exposures. I'd buy more of this.


My photo walk buddies, both checking the back of their cameras. They both occasionally carry film cameras, but were doing digital that day. I went just with film.


Introduction to this blog

Welcome!

Hello and thank you for visiting my photo galleries. You can use the tabs above or the links below as you choose. The galleries will be upda...