Friday, March 18, 2022

Black and white conversion

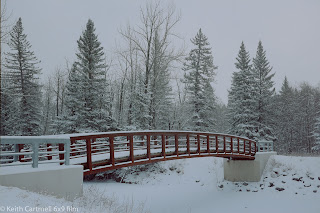
I've never done much black and white, but I'm coming around. I picked up some Ilford Delta 100 and went for a walk downtown with the loaner GL690. (Only a few more days till I get mine back!) The intent here was not to produce deathless art, but rather work on exposure. 

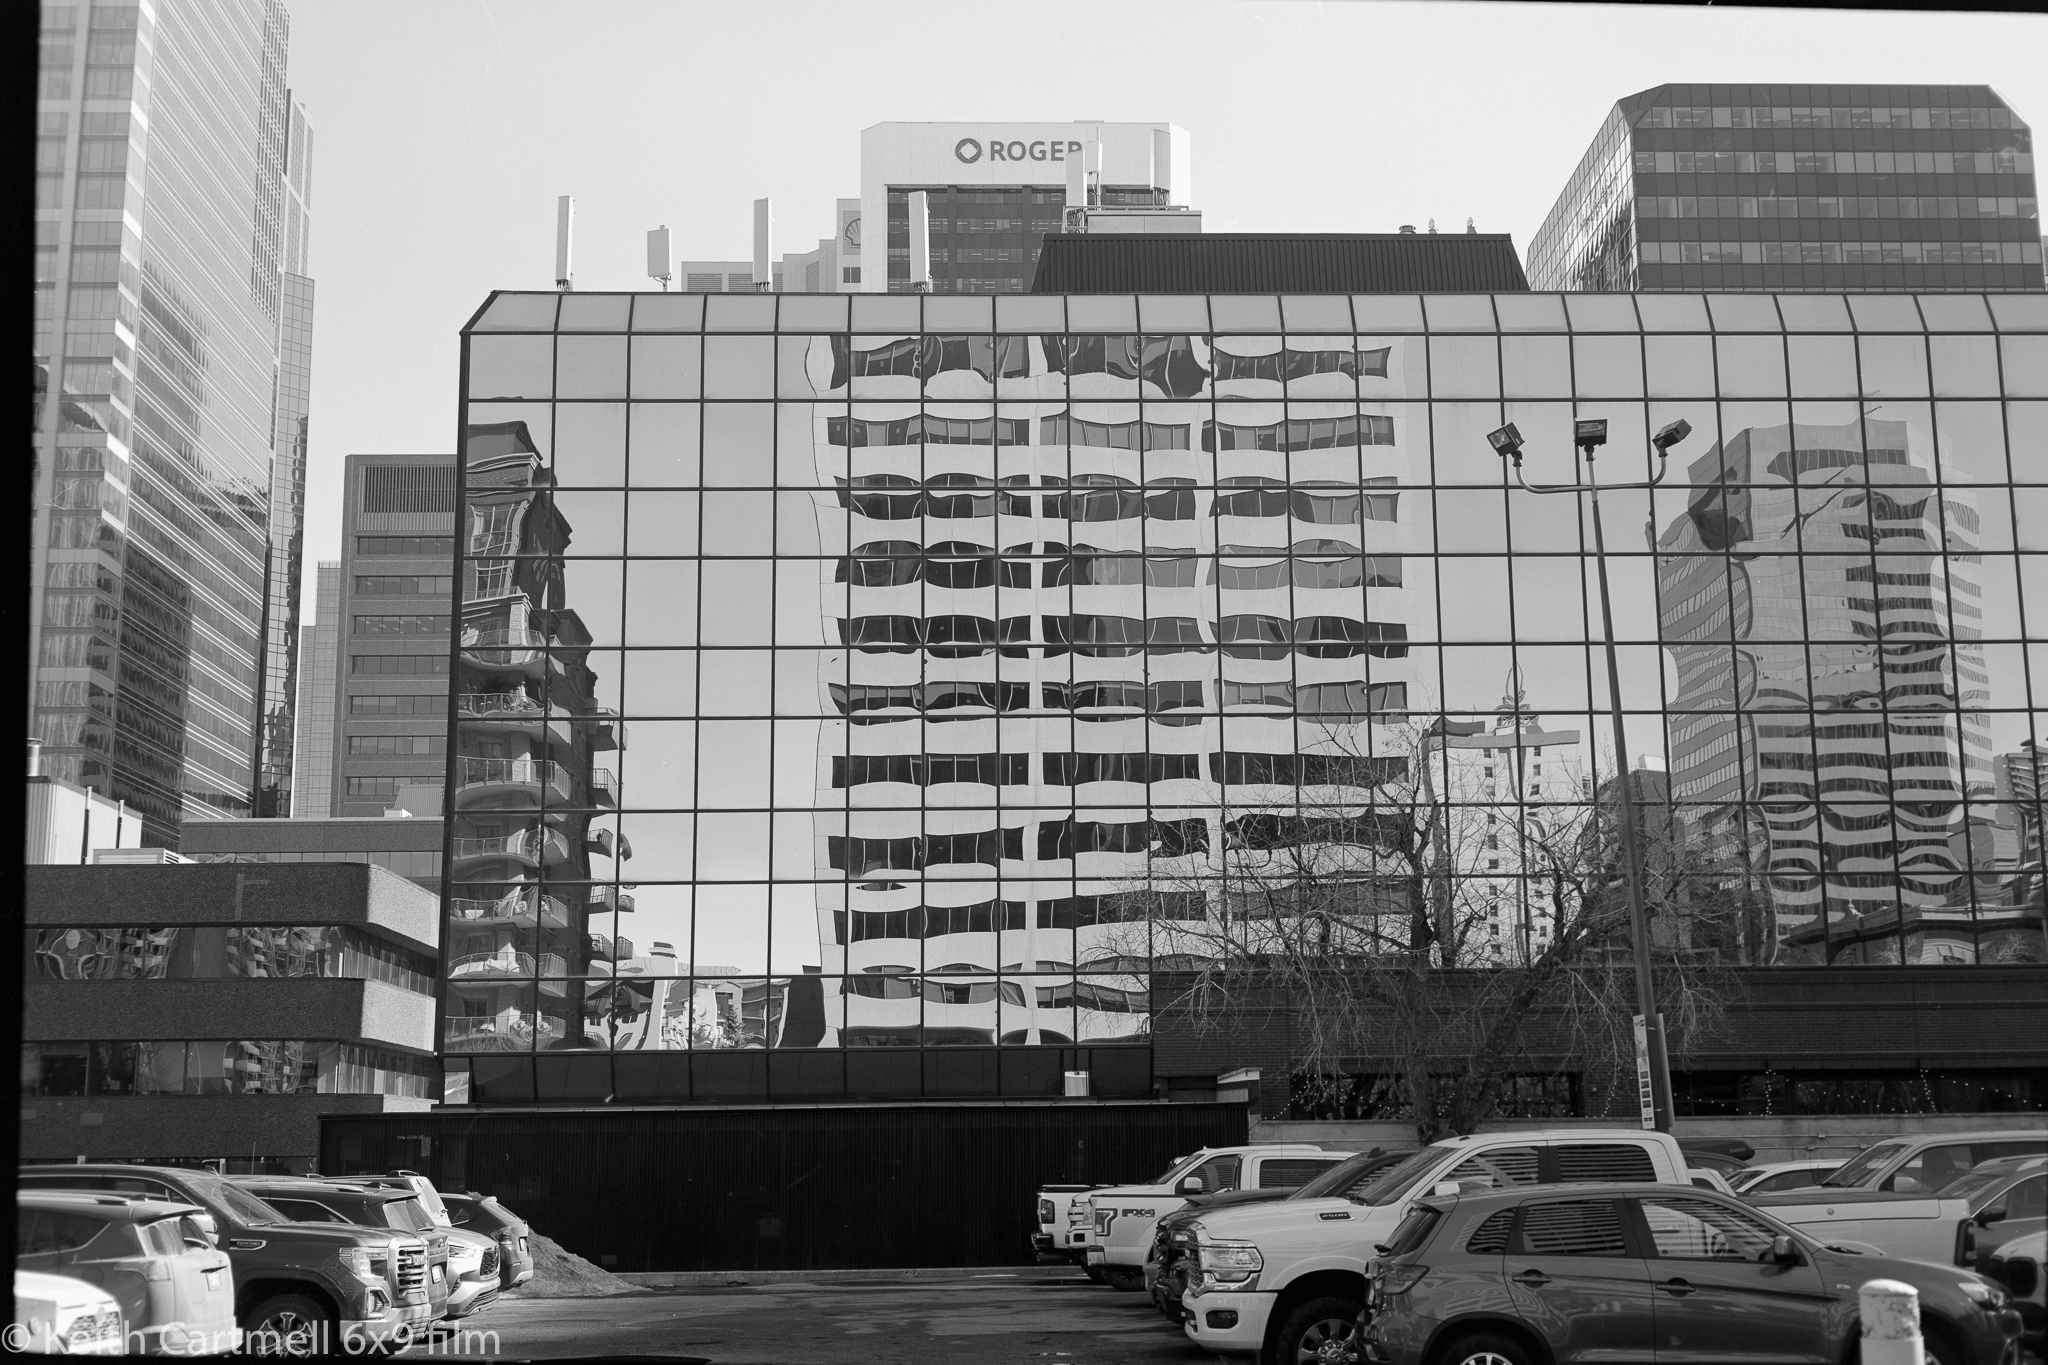
It was a bright sunny day, but mostly the shadows were not that dark because of all the reflections from the buildings. I'm pleased because the real goal was to get some detail in the shadows, and not totally lose details in the highlights, and I got that. I'll talk about this a bit more for the last two shots. However I blew the focus on one shot, much to my chagrin, because it's the shot I liked best. 7 of out 8 is a win in my books.

If you're reading this, you probably know the sunny 16 rule. It's a way of estimating exposure parameters without a light meter. Which, surprise, this camera doesn't have a light meter, and neither does mine, so I want to try to get my eyeballs calibrated for light. It goes like this, if your subject is in bright sunlight, f 16 and setting the shutter speed to the inverse of your film ISO will (usually) produce a good exposure. I only used the light meter on the last shot, the building in 8 and 9, because the difference between light and dark was quite strong. It took a while, I had to struggle with that because I'd accidentally tweaked a control. Of course there are other combinations of aperture and shutter speed that will work. You might choose differently for depth of field consideration, or tweak them depending on the exact light circumstances or the shot you have visualized or the particular film in the camera. 

Overall these are lightly edited. Some dust spots are still there but not as bad as the last scans. There are no filters on this camera, but I'll probably get a yellow one for future B&W shooting. That will help with cloud definition.

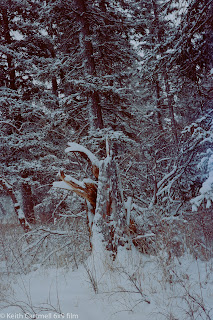
1. This is the negative, and then the positive, and I actually like the negative better. The positive is still a bit dark, and I could probably have pushed it a bit more. But there's a tiny bit of detail in the tree bark, so yay!


2.

3.

4.

5. We all know the bridge is a bright red, and I'm kind of tired of it as a subject. I wanted to see what it would look like in B&W. I really struggled with the composition for this because I'm still figuring out the frame lines in this camera. There's two sets of them because this particular camera has several lenses, though changing them is a pain. For whatever reason I got myself messed up as to which set of framelines applied to the lens I was using.


6. Reflections! And if I had the frame lines in the viewfinder figured out better, I'd have composed this slightly differently. I had no idea how this was going to look in B&W.


7. There was lots of gold in this image, which caught my eye. The right place for this composition was several yards closer to lose the light posts, but that would have put me in the middle of a busy street.


8. This is the one where I wanted to get the bit of texture detail in the light top of the building, and keep the brick detail around the S. There was full on sunlight, and lots of glare from the white walls of the construction walkway I was standing in. 


9. And the negative of 8. Again, I like this better than the positive.


There was a lovely couple sitting on a bench beside the river. I saw the shot clear as day, and asked if they minded having their photo taken. They did. Sigh. Maybe they're in the middle of an affair and they're afraid I'm a PI and the photos would be used as evidence. Except a PI wouldn't have asked.

All in all I'm quite pleased with these. It was a beautiful day for a walk, the photos turned out nicely, and the scan process is getting better. It's still a bit of a jury rigged affair. The hardest part is getting the camera in exactly the right place above the light pad. For those that care about the scanning process, the settings were ISO 100, f4, 1/50.

I've got a couple more rolls, and I'm wondering if I should try to run them through this camera. I want to see what the Ektar 100 looks like in medium format because I was a bit disappointed with it in 35mm. Then again, I slightly underexposed it, and it wasn't bright and sunny, which is where Ektar shines. I'd like to try some night shooting with it, and with the roll of Cinestill 800T I picked up. If you've got any questions about the GL690, ask quick, I only have it till Tuesday. Stay tuned!

Tuesday, March 15, 2022

Re-dos, and exposure failure

Still shooting the loaner GL690. My GW690 has been repaired by replacing a broken spring, and because of complicated travel arrangements beyond the scope of this blog, I will pick it up a week today. Can't wait!

I enjoy shooting the GL, but as previously noted, there are some learnings in progress. I'd mentioned last time there were issues with dust and hair during scanning. Just so you know, after looking at the hair under higher magnifications, I'm convinced it's Celina. 

There were three images from recent rolls that I liked where the scan had been ruined by dust and hair. The plan was to reshoot them, trying for less dust and no hair. Removing dust spots is merely tedious, but depending on the background hair is more difficult. 

Here's two of the reshot images, one of Longview, and one from our East Village walk. I'm pretty sure that even people that have never been to either place can figure out which is which. And yes, there are still dust spots. You go pixel peeping and you'll find them. Knock yourself out. Tell me where they are in an email sent to getalife@autodelete.com.


Sean and I went out to Banff for an early morning shoot last week. I brought the tripod, thinking to mount the GL on it and try some long exposure shots. We ended up stopping to help pull a couple out of the ditch. I don't know what the story was about how they got there, or what they had been doing previously at 3 in the morning up a dead end road. By the time that was all over and we arrived at the Lake Minnewanka dam we were well into hand held territory, so the tripods stayed in the car.

From a walk, breakfast, and chat with a friend the morning was a complete success. It's tough getting images in the Banff area that are not banal from over exposure, but from a digital perspective there are a few I'm pleased with. 

However, from a film output perspective the morning was a failure, other than collecting more learnings. I knew this experience would happen, and it will almost certainly happen again. No matter what I do, no matter how carefully I work on it, some of the shots are not going to work out. There are any number of reasons why. Some of them are "doh!" oops moments that could happen to anyone. Some of them are compositions or scenes that just didn't turn out as expected, usually because of the difference between how our brains see things, and how the camera sees things. That can happen in the digital world as well.

But for me the thing I'm struggling with is exposure. In the digital world it's easy to see that the exposure isn't right, and one can usually take shots till it is right. Bracketing is the work of a second. I'm still learning the light meter, and trying to train my eyes about what makes a good exposure. Even though for the films I've been shooting so far I've been chanting the mantra, err on the over exposure side, I'm not erring enough. Or I'm misreading the meter. Or the meter isn't seeing the darker areas I'm pointing it at.

The mountain shots were difficult light and I knew that. Morning sky very bright, shaded treed mountain sides very dark. Snow and ice in between. In fact, out of the 8 of them, I didn't like 7. Dark. Dust spotty. Banal composition. I thought at the time one was out of focus, but I can't see it in the scans, so that much is a success at least.

Here's a digital and film version of the only shot I kinda mostly like. I like the film version of the sunlit mountainside better, but there is no info in the trees no matter what I do. So I probably could have pushed the exposure a stop at least, and maybe two. Or get a graduated neutral density filter.


I shot a roll of Illford Delta 100 B&W while strolling around Princes Island and the west end of downtown. Stay tuned!

Tuesday, March 8, 2022

3 rolls from loaner GL690

To sum up the story so far, I bought a Fujica GW690, but it needed some TLC. It's off getting that, and I'm shooting a similar camera, a GL690. If you're interested in the differences between them you'll go look it up, or you know already. If not, you're already scrolling down.

I shot a roll of B&W on the way home, and two more of Portra 160 on a ramble with buddies in East Village. It's all a learning experience. Out of the 24 possible photos, I ended up with 11 that weren't horrible, although 3 of them are a special case I'll get into later. Which, all things considered, is better than I expected. 

Two of them are outright my bad, clicking the shutter by accident. Several more have soft focus, and a couple I cannot now think of why I thought that might make a good photo. One of them I took 3 different photographs of the negative, one to capture the whole frame, one quite a bit closer to zoom in on the person, and one that was about as close as I could get the lens to focus. 

There are a few shots where the negative is ok, but the digital photo is not. The problem is dust and hair, and I cleaned the lens first! I really did. Our house is quite dry, so I'm suspecting static attracted the dust during the process, and it moved around. Some of the shots are better than others, and it's ok removing a few spots in Lightroom. Others, like the Quirk Creek Gas Plant, are essentially ruined because of the dust and hair showing up in the sky. If the photo itself was better composed (I should have aimed the camera slightly to the right), I'd take another photo of the negative, rather than try to clean it up. Still, I know where the plant is, and it will be there for a while, so if I want a better photo I'd start with going to get a better photo, rather than work with what I've got.

Most of what remains are the 'there I was and this is what it looks like on film' sort of shots. I'll add them to the 'Of the Day feature on my other blog. Here's the ones I like the most.

I found this shed on a side road north of Longview. This was an exposure learning thing for me, trying to balance the deep shadow with the bright early afternoon sun on the snow. I used the light meter in the shade. There was minimal editing of the film version, mostly removing some dust spots, and I'm sure if you look closely you'll find more.


For comparison, here's a similar digital shot in colour. Normally I don't go on about settings, but sometimes that will happen here, given that it might be important to understand how the photo looks. The digital camera said ISO 100, f16, 1/125. Which is about what you'd expect shooting using the sunny 16 rule. I've already learned that in harsh Alberta mid day clear sky sunlight, the sunny 16 rule will be on the over exposure side just to start.


And converted to B&W.


These were not shot to be a comparison between the qualities of digital and film. Digital is digital, and film is film, and I believe that there's a time and place for each. All of these photos are lightly edited.

A selfie after coffee and a treat. Again, the composition is somewhat off.


The downtown Calgary public library is awesome! I've shot the inside, as has probably every other photographer in town. I liked the light on the curved wood, and again, this is an exposure learning shot.


 And the aforementioned multiple tries of the same negative. Ann was happy to pose, but this is not a carefully thought out portrait. We wanted to get on with coffee. Again, this is a tough exposure in the mid day light and her face is a little over exposed, especially in the third shot. I tried dealing with that, but didn't go that well, and I didn't want to put a lot of time into it. If I want a better shot of this, I'd start by buying her a coffee and getting a better shot on film.

Mainly I wanted to see what detail would be in the negative, and how close I could shoot with the macro lens during the scanning process. These are all the full camera shot, with no zooming or cropping. Looking at photo 3 in Lightroom you can still see the fine individual hairs and fabric details in the scarf and camera strap. Zooming in further, however, it begins to pixelate. 

So if I want a really detailed image, I could shoot the negative in 3 portrait orientation shots, and stitch them together in Lightroom. That would be about 6240 px by 9360 px wide. If I did everything right, putting the camera on a tripod, absolutely nailing the focus, using a really fine-grained film, and being really careful with the scanning photos, I could probably get a gigapixel image of 9 photos to stitch together. I can't imagine why I'd do such a thing, unless someone wanted a huge detailed print of something. Huge. Detailed.


So, more learnings:
  • Clean the lens even better!
  • Check the mirror and sensor for dust.
  • Try to control the static, though I confess I don't know how to do this.
  • Really work on exposure and focus. This not a camera for snap shots.
In other news, I've got a roll of 35 mm film in to London Drugs for developing and scan. As a reminder, I'll post the other images with some commentary in the Of the Day feature on my other blog, here, spread over a bunch of days. Stay tuned!

Friday, February 25, 2022

GW690, first negatives

The big day finally arrived! I dropped off the rolls of film (Portra 160) to Paul Stack on Tuesday. On Thursday I got an email saying they were ready to be picked up, and I did so on Friday. I had tried to shoot the film at box speed, at close to the indicated exposure, and didn't give any special instructions about developing. If you've been following along, you know I had some adventures with the camera, see here. That explains why there's only 6 images instead of 16.

I chose to do DSLR scanning using a Canon 6D mk ii, with the Canon L f2.8 100 mm macro lens. The settings are ISO 400, f3.2 and exposure varied between 1/60 and 1/125. For this first time I mounted the camera underneath the tripod, with the light pad on the floor. Not the most convenient setup, but this is a bit of an experiment with the whole process. (If I'd had my wits about me I'd have taken a photo of the setup. Maybe next time. I was eager to see the scans.) I think what I'd like to do is create a permanent setup where I can clip the camera in, turn on the light pad, tweak the camera settings, and start shooting. However I'm not sure what that looks like just now.

Overall I'm pretty pleased. There were a bunch of firsts here:
-First time shooting a medium format camera. 
-First time shooting a rangefinder focussing system. 
-First time using a light meter (the iPhone app myLightMeter). 
-First time scanning the negative with a DSLR. 
-First time running the Negative Lab Pro software, which is pretty easy, and offers lots of choices for editing. Some are similar to Lightroom, some are not. I'm going to have to work with these a bit to see what works best for workflow. It's really easy to push the sliders and have have things look weird.

These photos are cropped and rotated to be square. They are lightly edited in Negative Lab Pro, and a few more tweaks in Lightroom. The first couple might be a bit dark.

Without further ado, here's the photos. 1 and 2 are Bebo Grove, and the rest are Shannon Terrace in Fish Creek.
1.

2.

3. This is actually the first shot I took. The blue car pops out nicely.

4.

5. Bridge 2 is my favourite, but I wasn't going to walk on what might or might not be solid ice to get the nice shot looking up river.

6.

My thoughts.
I can say without hesitation they look different than digital photos, though I don't think I could describe how or why. The only one I don't actually like is the last one, the stump. I was feeling a bit rushed on that shot for no reason I can articulate, and I think it shows.

Even though the camera problems were frustrating, I kept in mind that it was a 40 year old device, and who knows when it was last shot. It could have been sitting on a shelf feeling unloved for a decade or more. The borrowed GL690 is a sweet shoot, though it doesn't feel as comfortable in my hands. I can't wait to have the GW back.

Editing for digital photos is mostly a no brainer now. My camera is set up to produce the images a certain way, I typically expose shots in a similar way, and it leads to doing similar things in Lightroom. Things are different working from a medium format negative. I emphatically do NOT want to edit them to look like they were shot digitally! So this is going to be a work in progress. I'll probably take some time and bang the sliders around on a virtual copy, just to see what they do.

One thing was right in my face. Dust spots. They aren't on the negative. I removed a bunch, and there's probably more. When I looked later the camera lens was filthy.

Something to try. Set up the camera so it shoots the the negative in portrait mode, and take 3 or 4 shots to create a panorama of one negative. Done right, this ought to bring up more detail.

My learnings, so far:
-Go through things methodically, step by step. 
-Think about composition. 
-Double check the light. 
-Make sure the lens cap is off. (I didn't goof on that, but I'm told it's just a matter of time with a rangefinder. 
-Take the time to get the settings and focus right. 
-Clean the camera lens! 
-Check for dust on the sensor and negatives and light pad. 
-The camera needs to be a little closer to the negative, and block out more of the extraneous light.

There is a roll of B&W being developed, stay tuned.

If you want to follow along on my film adventure, send a request through email (look in the profile page), or on a comment here (hint, blogger hates mobile devices and nothing I can do about it), or via Facebook or Instagram. Or if you know my cell you could send a text. I'll add you to a mailing list that will get sent out when I post here. People who subscribe like this sometimes get extra goodies!

Wednesday, February 23, 2022

GW690, first shooting experience

 If you've been following along on my personal blog (here, specifically for the start of the medium format story) you know that I recently purchased a Fujica GW690, and have been shooting some 35mm film on some borrowed cameras.

I think what I'm going to do is migrate the whole film thing to this blog, and talk about it in a bit more detail. It might be a mix of 35mm and medium format, but I'll label things for you. Once I get a bit of a library of medium format shots I like, I'll probably add another section to my portfolio site for them. 

It was cold and snowing again last Thursday but around noon it looked like things were breaking up. I loaded some Portra 160, used sunny 16 (with a light meter check) to set the camera at f16 and 1/125. Technically it should be 1/160, but the camera doesn't offer that choice, and I chose to overexpose a little by selecting a slightly slower shutter. I'm still getting used to the light meter, and it was suggesting 1/250. Onwards.

Fish Creek is my favourite place to go if I don't have a specific location in mind. It's beautiful any time of day, any time of year. The point was to get some snowy shots with dark trees for contrast, and maybe some of the cloud definition.

All went well till shot 5. I was enjoying the process, the camera felt great in my hands. There was still some light snow so I was tucking the camera into my parka between shots. That didn't go so well. I think next time I'll try to keep it in a plastic bag between shots. I'm pretty sure that weather sealing wasn't really a thing when it was manufactured. 

When I got to shot 5 I found the film advance lever wouldn't move, and I couldn't click the shutter. After a bit of jiggling I got it to go and did another shot, then got the same problem. I ended up going home again, and taking the film out in a dark room. Once the film was out, the advance worked fine. Which it had before I put the film in. I found out later I might not have advanced the lever fully during the first stroke.

So I put the next roll of film in, and headed down to Fish Creek again. This time things froze up/jammed on the second shot. I cheated by cracking the back open, briefly, and going through a routine of taking a shot and jamming again. Once home I pulled out that roll, and did some test firing. To say the shutter was erratic is an understatement, though it sounded normal otherwise. 

Dave from Film Experience asked me to bring it back, and he'll send it off for CLA, that is, Clean, Lubricate, Adjust. It's been a while since that camera was shot, so things may have set in place, or lubricant is gucked up, or something not quite right. He wasn't sure how long the process will take, and it could be much longer if it actually needs parts. Though I did see one of these on eBay to be sold for parts... Such are the trials of shooting a 40 year old camera.

In the meantime I have a very similar loaner camera, a GL690. It doesn't feel as good in my hands, but I ran a roll of B&W through on the way home from the store. Still getting used to setting exposure using a light meter. Using the range finder is easy, though I have to remember to actually focus.

Both rolls are off to be developed, with a note saying there might not be any images at all, or overlapping images. When I pick them up, I'll drop off the roll of B&W. Then I can do a trial run through the process of DSLR scanning, and negative to positive adjustments in Lightroom. I'll blog again when I have photos to show you. After reading about a sharp lens and a 6x9cm negative, I can't wait! Stay tuned.

Right now I have one blog notification mailing list, and I send it out when either blog gets updated. If you'd like to be notified when I update just this one, because you're interested in the film experience, and not my personal blithering let me know with a note to keith at nucleus dot com and I'll create a second list.

Introduction to this blog

Welcome!

Hello and thank you for visiting my photo galleries. You can use the tabs above or the links below as you choose. The galleries will be upda...