Tuesday, March 8, 2022

3 rolls from loaner GL690

To sum up the story so far, I bought a Fujica GW690, but it needed some TLC. It's off getting that, and I'm shooting a similar camera, a GL690. If you're interested in the differences between them you'll go look it up, or you know already. If not, you're already scrolling down.

I shot a roll of B&W on the way home, and two more of Portra 160 on a ramble with buddies in East Village. It's all a learning experience. Out of the 24 possible photos, I ended up with 11 that weren't horrible, although 3 of them are a special case I'll get into later. Which, all things considered, is better than I expected. 

Two of them are outright my bad, clicking the shutter by accident. Several more have soft focus, and a couple I cannot now think of why I thought that might make a good photo. One of them I took 3 different photographs of the negative, one to capture the whole frame, one quite a bit closer to zoom in on the person, and one that was about as close as I could get the lens to focus. 

There are a few shots where the negative is ok, but the digital photo is not. The problem is dust and hair, and I cleaned the lens first! I really did. Our house is quite dry, so I'm suspecting static attracted the dust during the process, and it moved around. Some of the shots are better than others, and it's ok removing a few spots in Lightroom. Others, like the Quirk Creek Gas Plant, are essentially ruined because of the dust and hair showing up in the sky. If the photo itself was better composed (I should have aimed the camera slightly to the right), I'd take another photo of the negative, rather than try to clean it up. Still, I know where the plant is, and it will be there for a while, so if I want a better photo I'd start with going to get a better photo, rather than work with what I've got.

Most of what remains are the 'there I was and this is what it looks like on film' sort of shots. I'll add them to the 'Of the Day feature on my other blog. Here's the ones I like the most.

I found this shed on a side road north of Longview. This was an exposure learning thing for me, trying to balance the deep shadow with the bright early afternoon sun on the snow. I used the light meter in the shade. There was minimal editing of the film version, mostly removing some dust spots, and I'm sure if you look closely you'll find more.


For comparison, here's a similar digital shot in colour. Normally I don't go on about settings, but sometimes that will happen here, given that it might be important to understand how the photo looks. The digital camera said ISO 100, f16, 1/125. Which is about what you'd expect shooting using the sunny 16 rule. I've already learned that in harsh Alberta mid day clear sky sunlight, the sunny 16 rule will be on the over exposure side just to start.


And converted to B&W.


These were not shot to be a comparison between the qualities of digital and film. Digital is digital, and film is film, and I believe that there's a time and place for each. All of these photos are lightly edited.

A selfie after coffee and a treat. Again, the composition is somewhat off.


The downtown Calgary public library is awesome! I've shot the inside, as has probably every other photographer in town. I liked the light on the curved wood, and again, this is an exposure learning shot.


 And the aforementioned multiple tries of the same negative. Ann was happy to pose, but this is not a carefully thought out portrait. We wanted to get on with coffee. Again, this is a tough exposure in the mid day light and her face is a little over exposed, especially in the third shot. I tried dealing with that, but didn't go that well, and I didn't want to put a lot of time into it. If I want a better shot of this, I'd start by buying her a coffee and getting a better shot on film.

Mainly I wanted to see what detail would be in the negative, and how close I could shoot with the macro lens during the scanning process. These are all the full camera shot, with no zooming or cropping. Looking at photo 3 in Lightroom you can still see the fine individual hairs and fabric details in the scarf and camera strap. Zooming in further, however, it begins to pixelate. 

So if I want a really detailed image, I could shoot the negative in 3 portrait orientation shots, and stitch them together in Lightroom. That would be about 6240 px by 9360 px wide. If I did everything right, putting the camera on a tripod, absolutely nailing the focus, using a really fine-grained film, and being really careful with the scanning photos, I could probably get a gigapixel image of 9 photos to stitch together. I can't imagine why I'd do such a thing, unless someone wanted a huge detailed print of something. Huge. Detailed.


So, more learnings:
  • Clean the lens even better!
  • Check the mirror and sensor for dust.
  • Try to control the static, though I confess I don't know how to do this.
  • Really work on exposure and focus. This not a camera for snap shots.
In other news, I've got a roll of 35 mm film in to London Drugs for developing and scan. As a reminder, I'll post the other images with some commentary in the Of the Day feature on my other blog, here, spread over a bunch of days. Stay tuned!

Friday, February 25, 2022

GW690, first negatives

The big day finally arrived! I dropped off the rolls of film (Portra 160) to Paul Stack on Tuesday. On Thursday I got an email saying they were ready to be picked up, and I did so on Friday. I had tried to shoot the film at box speed, at close to the indicated exposure, and didn't give any special instructions about developing. If you've been following along, you know I had some adventures with the camera, see here. That explains why there's only 6 images instead of 16.

I chose to do DSLR scanning using a Canon 6D mk ii, with the Canon L f2.8 100 mm macro lens. The settings are ISO 400, f3.2 and exposure varied between 1/60 and 1/125. For this first time I mounted the camera underneath the tripod, with the light pad on the floor. Not the most convenient setup, but this is a bit of an experiment with the whole process. (If I'd had my wits about me I'd have taken a photo of the setup. Maybe next time. I was eager to see the scans.) I think what I'd like to do is create a permanent setup where I can clip the camera in, turn on the light pad, tweak the camera settings, and start shooting. However I'm not sure what that looks like just now.

Overall I'm pretty pleased. There were a bunch of firsts here:
-First time shooting a medium format camera. 
-First time shooting a rangefinder focussing system. 
-First time using a light meter (the iPhone app myLightMeter). 
-First time scanning the negative with a DSLR. 
-First time running the Negative Lab Pro software, which is pretty easy, and offers lots of choices for editing. Some are similar to Lightroom, some are not. I'm going to have to work with these a bit to see what works best for workflow. It's really easy to push the sliders and have have things look weird.

These photos are cropped and rotated to be square. They are lightly edited in Negative Lab Pro, and a few more tweaks in Lightroom. The first couple might be a bit dark.

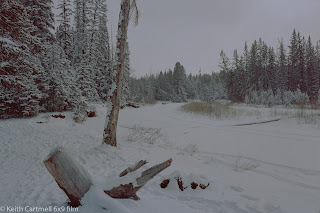
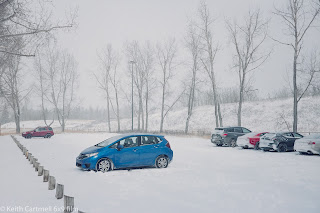
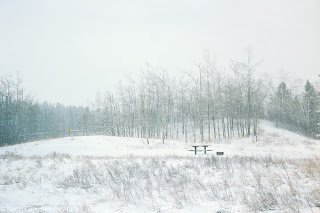
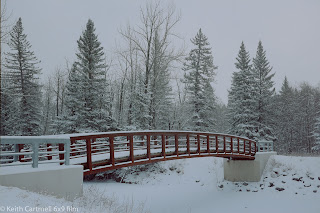
Without further ado, here's the photos. 1 and 2 are Bebo Grove, and the rest are Shannon Terrace in Fish Creek.
1.

2.

3. This is actually the first shot I took. The blue car pops out nicely.

4.

5. Bridge 2 is my favourite, but I wasn't going to walk on what might or might not be solid ice to get the nice shot looking up river.

6.

My thoughts.
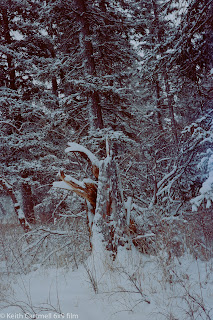
I can say without hesitation they look different than digital photos, though I don't think I could describe how or why. The only one I don't actually like is the last one, the stump. I was feeling a bit rushed on that shot for no reason I can articulate, and I think it shows.

Even though the camera problems were frustrating, I kept in mind that it was a 40 year old device, and who knows when it was last shot. It could have been sitting on a shelf feeling unloved for a decade or more. The borrowed GL690 is a sweet shoot, though it doesn't feel as comfortable in my hands. I can't wait to have the GW back.

Editing for digital photos is mostly a no brainer now. My camera is set up to produce the images a certain way, I typically expose shots in a similar way, and it leads to doing similar things in Lightroom. Things are different working from a medium format negative. I emphatically do NOT want to edit them to look like they were shot digitally! So this is going to be a work in progress. I'll probably take some time and bang the sliders around on a virtual copy, just to see what they do.

One thing was right in my face. Dust spots. They aren't on the negative. I removed a bunch, and there's probably more. When I looked later the camera lens was filthy.

Something to try. Set up the camera so it shoots the the negative in portrait mode, and take 3 or 4 shots to create a panorama of one negative. Done right, this ought to bring up more detail.

My learnings, so far:
-Go through things methodically, step by step. 
-Think about composition. 
-Double check the light. 
-Make sure the lens cap is off. (I didn't goof on that, but I'm told it's just a matter of time with a rangefinder. 
-Take the time to get the settings and focus right. 
-Clean the camera lens! 
-Check for dust on the sensor and negatives and light pad. 
-The camera needs to be a little closer to the negative, and block out more of the extraneous light.

There is a roll of B&W being developed, stay tuned.

If you want to follow along on my film adventure, send a request through email (look in the profile page), or on a comment here (hint, blogger hates mobile devices and nothing I can do about it), or via Facebook or Instagram. Or if you know my cell you could send a text. I'll add you to a mailing list that will get sent out when I post here. People who subscribe like this sometimes get extra goodies!

Wednesday, February 23, 2022

GW690, first shooting experience

 If you've been following along on my personal blog (here, specifically for the start of the medium format story) you know that I recently purchased a Fujica GW690, and have been shooting some 35mm film on some borrowed cameras.

I think what I'm going to do is migrate the whole film thing to this blog, and talk about it in a bit more detail. It might be a mix of 35mm and medium format, but I'll label things for you. Once I get a bit of a library of medium format shots I like, I'll probably add another section to my portfolio site for them. 

It was cold and snowing again last Thursday but around noon it looked like things were breaking up. I loaded some Portra 160, used sunny 16 (with a light meter check) to set the camera at f16 and 1/125. Technically it should be 1/160, but the camera doesn't offer that choice, and I chose to overexpose a little by selecting a slightly slower shutter. I'm still getting used to the light meter, and it was suggesting 1/250. Onwards.

Fish Creek is my favourite place to go if I don't have a specific location in mind. It's beautiful any time of day, any time of year. The point was to get some snowy shots with dark trees for contrast, and maybe some of the cloud definition.

All went well till shot 5. I was enjoying the process, the camera felt great in my hands. There was still some light snow so I was tucking the camera into my parka between shots. That didn't go so well. I think next time I'll try to keep it in a plastic bag between shots. I'm pretty sure that weather sealing wasn't really a thing when it was manufactured. 

When I got to shot 5 I found the film advance lever wouldn't move, and I couldn't click the shutter. After a bit of jiggling I got it to go and did another shot, then got the same problem. I ended up going home again, and taking the film out in a dark room. Once the film was out, the advance worked fine. Which it had before I put the film in. I found out later I might not have advanced the lever fully during the first stroke.

So I put the next roll of film in, and headed down to Fish Creek again. This time things froze up/jammed on the second shot. I cheated by cracking the back open, briefly, and going through a routine of taking a shot and jamming again. Once home I pulled out that roll, and did some test firing. To say the shutter was erratic is an understatement, though it sounded normal otherwise. 

Dave from Film Experience asked me to bring it back, and he'll send it off for CLA, that is, Clean, Lubricate, Adjust. It's been a while since that camera was shot, so things may have set in place, or lubricant is gucked up, or something not quite right. He wasn't sure how long the process will take, and it could be much longer if it actually needs parts. Though I did see one of these on eBay to be sold for parts... Such are the trials of shooting a 40 year old camera.

In the meantime I have a very similar loaner camera, a GL690. It doesn't feel as good in my hands, but I ran a roll of B&W through on the way home from the store. Still getting used to setting exposure using a light meter. Using the range finder is easy, though I have to remember to actually focus.

Both rolls are off to be developed, with a note saying there might not be any images at all, or overlapping images. When I pick them up, I'll drop off the roll of B&W. Then I can do a trial run through the process of DSLR scanning, and negative to positive adjustments in Lightroom. I'll blog again when I have photos to show you. After reading about a sharp lens and a 6x9cm negative, I can't wait! Stay tuned.

Right now I have one blog notification mailing list, and I send it out when either blog gets updated. If you'd like to be notified when I update just this one, because you're interested in the film experience, and not my personal blithering let me know with a note to keith at nucleus dot com and I'll create a second list.

Wednesday, January 5, 2022

Image of 2021

 I'm starting to look at images shortly after selecting the November image of the month. I've got about 150 four star images to think about, and they're all good in one way or another. Some are better than others, or so I think, and then when I look at them later it's a different group that's better. 


As long time readers know, Image of the Year is an opportunity for some major league dithering. Five of the image of the month winners are in the running for the big prize. Like a door prize, all the tickets go back in the hat. 

Dec 6 (more)
The plan is to work with the images, sit with them a bit as a group and individually, and think about them, which is best and why. This usually involves a review of my star ratings.

Christmas I'm down to 18, pondering. A lot.

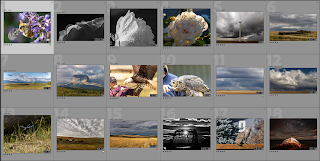
Jan 1, shortly after posting December Image of the Month. Still at 18, because it's going to actively hurt to take any of them out of the running. Here's the finalists.


I just counted, 2/3 of them were taken on Neil field trips. Which seems to prove the rule that if you want more interesting photos, you go stand in the way of interesting. Of the other 6, 5 were in the garden or near the house, and the dragonfly was in Fish Creek. No trip to New Zealand, or anywhere else for that matter.

A little while ago I was reading a photographer who talked about the value of printing your work. How it was a different experience holding a piece of paper (or canvas, or many other materials) and looking at an image, as opposed to seeing on screen. One of my buddies has had difficulties in printing books because the image looks different on paper. 

I've printed several images (Image 2017, Nov 2016, and all three in March 2017) plus number 18 above was printed for the Christmas exchange, and I was pleased to see Sean end up with it. I can't wait to see it on paper. My thinking was that I'd print a few but display most of them on screen using an old computer. That part didn't work out as well as I had hoped, and I'm now going back to the idea of printing some shots. It seems to me that finalists for the Image of the Year would be good candidates for printing. There's lots of wall space, right? Except I need to get more of the cool hanging mechanism, where there's a track along the top of the wall, and clear hangers to hook the photo frames to.

Jan 3, I think I'm down to 4. Two for sure, and then I have to decide between a pair of images that give me a similar vibe. At least I think so.

Sean has talked about photos that have heart. I'm not entirely sure what he means, since there are a number of possible meanings. In any case, it seems to be a good thing, and he has mentioned that some of my photos have it. As it turns out, Sean and I did a walk along the Bow River on the weekend, and that involved visiting his place to look at the steel wool print. I'm quite pleased with it. 

As it turns out, the version that was printed is not quite the same as the version under consideration. The printed version had to be cropped to fit a predetermined size, which did not include the native size. There are some subtle differences between the print and the display version. He asked me to sign it, which is always nice.

I'm thinking that heart means a photo should evoke an emotional response of some kind. That's kind of tricky for the photographer, since they were there, and can place the image in the context of the surroundings, who was with you, how you were feeling at the time, and everything else. All a viewer gets is the image itself.

Several of the flower shots from this year made the cut to the finalists, but none of the bright colour ones. Many people think of a photo with more colour as "better", and it's certainly one way to catch the attention of a viewer. But I'm trying to get beyond the quick like on Instagram photos. I'm trying to get to photos that people will want to return to, and take some time with, as opposed to the near infinity of other photos out there and all the distractions the world has to offer.

I continue to return to the question, what is best? How to get better photographs? I can't stand it when people say a photographer got lucky for a shot. Odds are they put work into being in the right place at the right time, with the right equipment, and if outdoors, hoping the light and everything else works out. I've been part of a group to get ho-hum photos while someone else in the group got THE shot. They knew how to take advantage. They knew how to set the camera to get the shot, with no futzing about while the moment disappears. Sometimes it's being patient, waiting for a cloud to move. Sometimes it's looking in the right direction.

Part of it is being able to recognize the raw materials in the wild for a good photo, and knowing how to work with it to get what you want. Perhaps it's getting into a particular vantage point (inches matter sometimes), or getting the sun in exactly the right spot, or using specific camera settings, or tweaking the scene to remove distractions. Knowing to put a model exactly there, as opposed to nearby locations. Realizing a scene might be far better in the fall instead of the spring, and remembering to come back.

So after much dithering and considering, I'm down to my final three. For the curious, choosing between number 11 above, and the second runner up below was the tough decision. I considered giving 11 an honourable mention, and I guess this is a way of giving it a semi-honourable mention. There's lots going on in the photo, as I noted in the August image of the month blog. Maybe if I'd been a little closer, so the train was bigger, and there wasn't as much empty field...

Second Runner Up
Taken during a Zeller tour of the Foothills. Those that saw the photos on the blog at the time know we had terrific light all day. I fell in love with this landscape as soon as I saw it. It reminds me a bit of Tombstone Park in Yukon. The light on the field, the shadows, the farm building that is almost completely hidden, the cows and hay bales, so much detail to look at! This panorama would print out about 3 feet wide in exquisite detail. I think I would do it on canvas.


First Runner Up
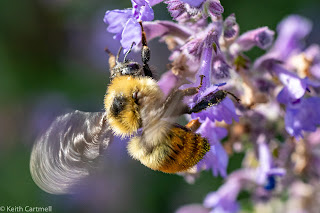
I just love shooting bees. They're so beautiful, so detailed, and so hard to capture. A bee just hanging there wouldn't have done it, but the light on the moving wing was perfect. I wish I could say I sweet talked the bee into posing, and got the settings just right, but it was much too busy to listen to me. Some people might be interested in knowing this photo captures 1/640 of a second.


Image of 2021
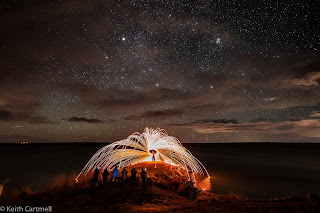
Another Zeller night sky tour. It was a windy night so I spent part of the night in the lee of a building shooting southward. A little later the skies cleared a bit and we moved into the next clearing to shoot SW towards the galactic core until the clouds rolled in again. Then as a reward, Neil went out onto the little spit of land into Clear Lake, and spun some burning steel wool. 

Everybody else got close, and you can see them lined up. I think for most of the people it was the first time they had seen this sort of thing. I chose to stay behind the group, with two cameras running. One with a wide lens and one with a long lens for the closeup. This is one occasion where I saw the shot before I took it, and it worked out. In hindsight I could have been a little closer, but I'm thrilled about getting everything right.


Friday, November 5, 2021

A bit more about Loungecat Productions

You may have noticed a new logo on my other blog, and it also appears on this one. So what's that all about?

It's been brewing for a while. There's lots of times I'll want to show someone a photo I've done. Unless it was within a couple days, finding it on the near-daily blog is impossible. I wanted a place to put my best work where it was easy to find photos. 

For a while that was this blog site. There's a bunch of tabs up top with varying number of photos in each. It was hard to come up with those tabs, and I'm not sure how relevant they are now. Some of them haven't been updated in a while because I haven't taken any of those kinds of photos for a while. Just as an example, Abstracts, Cats, and Cityscapes haven't been updated in a couple years. Now that Loungecat Productions is up, I'm not sure what I'll do with it. It's main use now is collecting Image of the Month, and photos from Community Association events. 

In another thread, I've done some work for clients who asked for my logo to put on their website or on the music album that is being produced (Yay me!) Except I didn't have a logo. I've been musing about it for a while, and have doodled some sketches, but hadn't really got anywhere. 

So putting the two things together I wanted to get a logo, and put it on a portfolio site with my best work. It would be easy to point people to it, or show someone on my phone. Except then the question became where to host it. I dithered about that for a while, making lists of the various advantages and disadvantages of sites like Squarespace, Wix, Weebly, 500 Px, Adobe Portfolio, and others. 

Do you want the whole evaluation and decision story? I thought not. I ended up with Adobe Portfolio for a couple reasons. The main one is that it's free to me since I already subscribe to Lightroom. It also seamlessly synchs with Lightroom, which is a bigger advantage than it first appears. The disadvantages don't affect me, at least not so far. I had my problems setting up a trial run at it a couple years ago and got myself all confused and upset, but decided to have another go. And it turned out to be slick as grass through a goose, including buying the domain name. 

So now it's up. You had a sneak peek earlier this week and I've added considerably to it. The main addition is Green Fools photos. You haven't seen them unless you follow them on Instagram, and even then you might not have known they were me. I've added a few other photos here and there that were overlooked for whatever reason.

But do me a favour, please and thank you. Go to the personal eclectic page and look at that first photo of Curtis. If you roll your mouse over that photo, you'll see some text pop up. What do you think of that? Does having some pop up text that is relevant to that photo enhance it, or detract from it? Fill in the contact form and let me know what you think, P&TY again.

In other news the 50 project is going well. Still rounding up models. A few have been a bit hesitant, but nobody has said no yet. This will keep me going for a while. I haven't moved forward on the hands project.

And no, I didn't get any photos of the aurora the other night. I was out the next night with some buddies doing a night sky workshop with Neil Zeller, but no aurora. I got a long sequence that I'm going to see how it looks as a movie. I don't think it will work as a star trails photo, but it's easy enough to try and see.

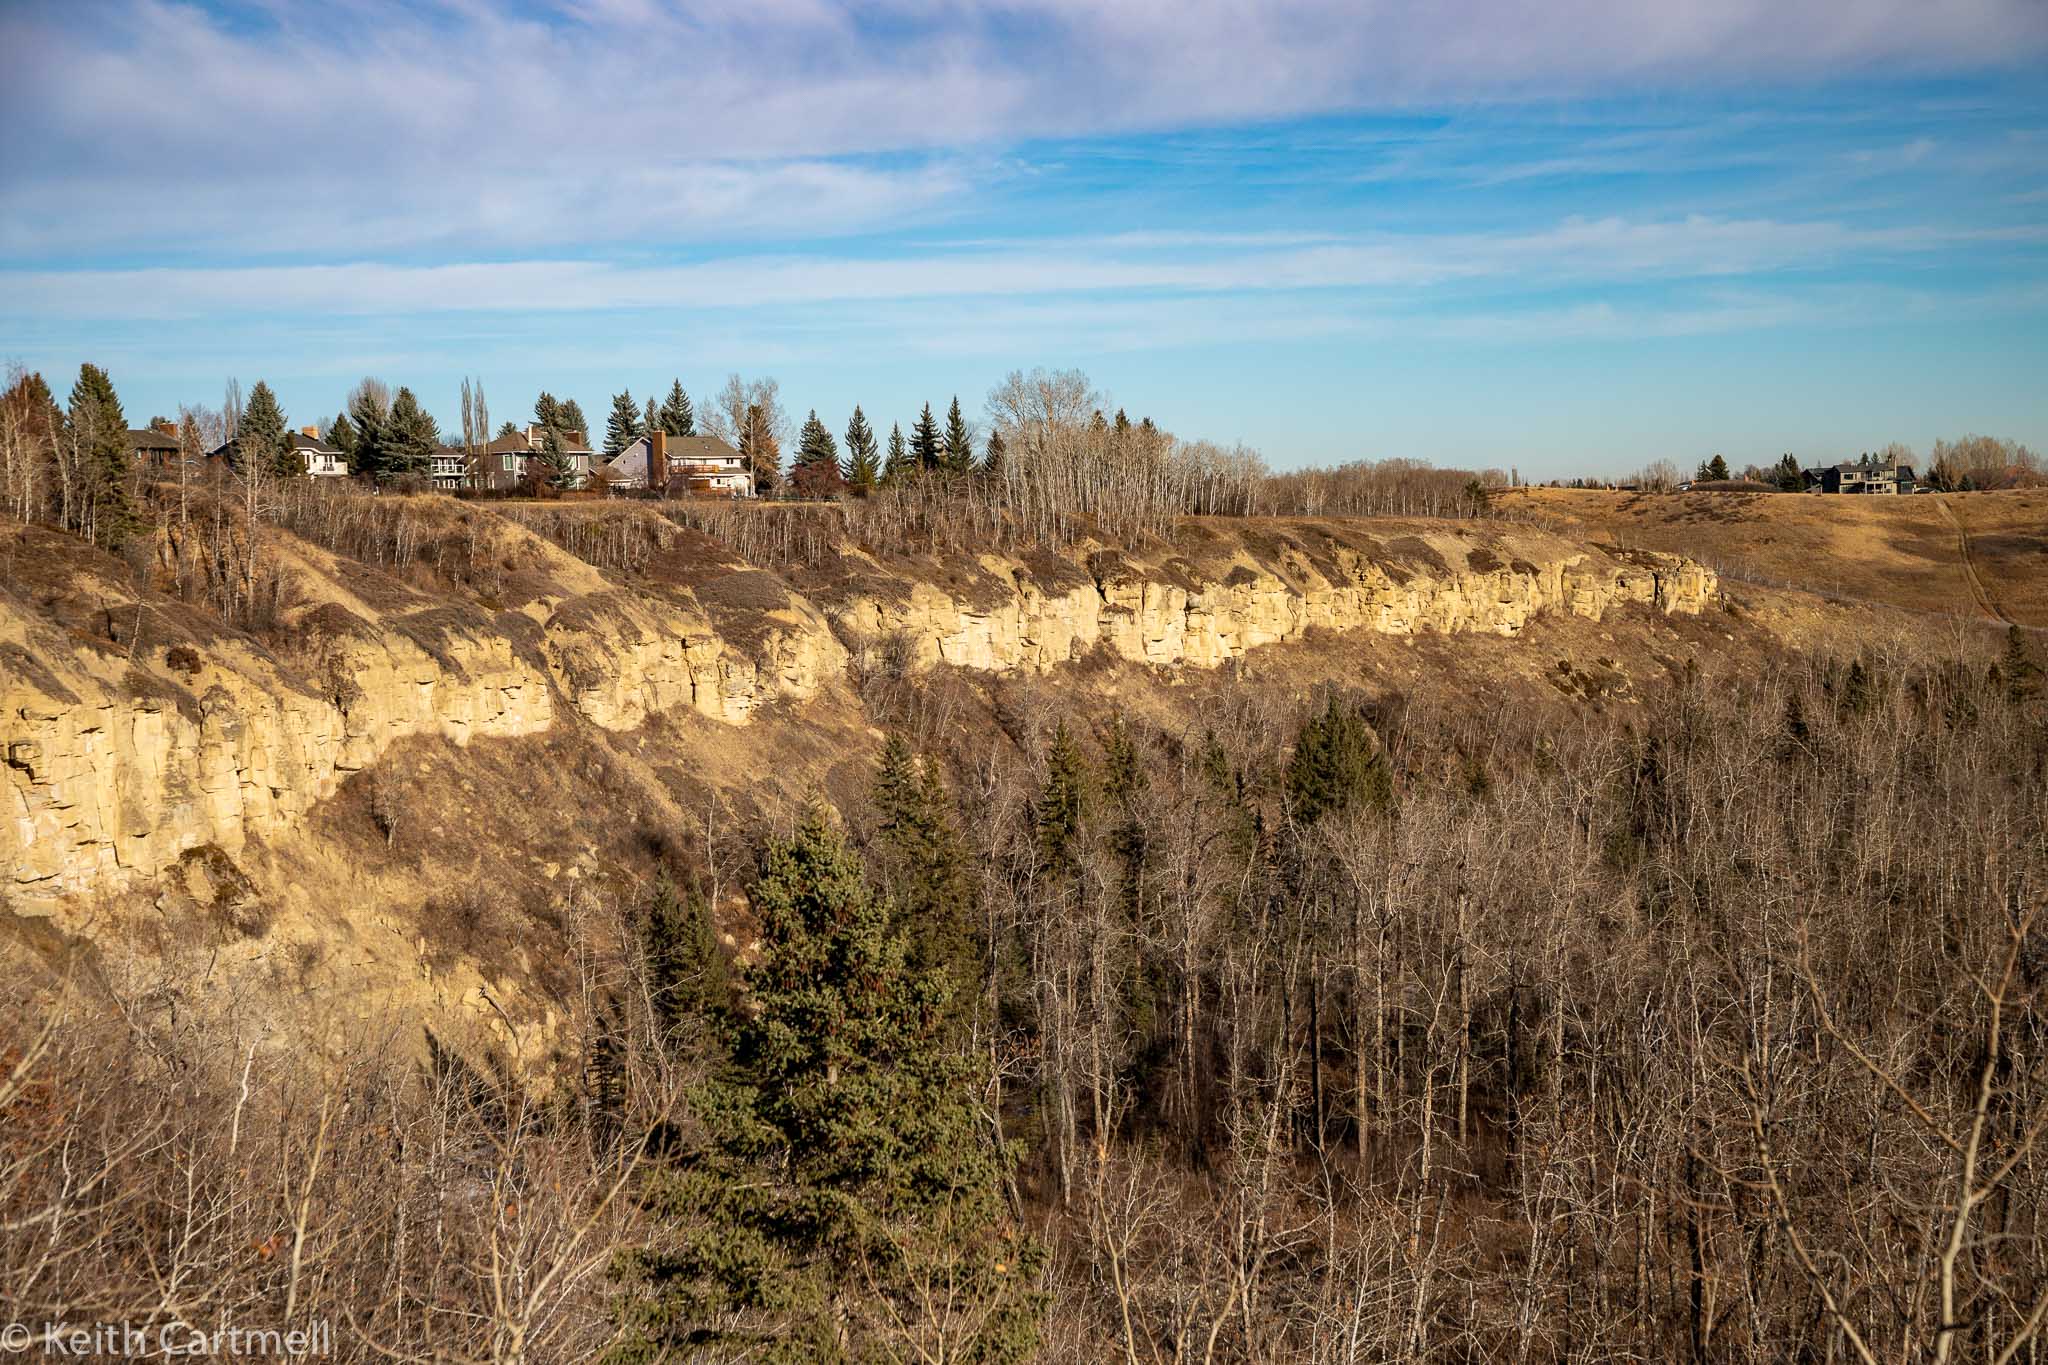
Lastly, to give you some photos to look at (after all, this is about photography) I did a fun exercise with some photo buddies. The challenge was to find a good spot and take 24 photos without moving your feet. I took that to mean turning around was ok, and since it didn't say anything about lenses, I'd use different ones. I ended up using 150-600mm, 70-200mm, 24-105mm, 100mm macro with and without extension tubes, and 14mm. That good spot turned out to be on top of a bluff in Fish Creek overlooking bridges 5 and 6.


Introduction to this blog

Welcome!

Hello and thank you for visiting my photo galleries. You can use the tabs above or the links below as you choose. The galleries will be upda...